How to Vacuum Test a Car Ac System
This guide teaches you how to vacuum test a car AC system to identify leaks and moisture, ensuring your AC runs efficiently. You’ll learn the tools needed, step-by-step procedures, and troubleshooting tips for accurate results.
Key Takeaways
- Vacuum testing removes air and moisture from the AC system, preventing ice formation and corrosion.
- A vacuum pump and gauge set are essential for performing an accurate test.
- Pull a deep vacuum (29–30 inHg) and hold it for at least 30 minutes to confirm system integrity.
- Pressure drop indicates a leak—recheck connections and components if the vacuum doesn’t hold.
- Always wear safety gear like gloves and eye protection when working with refrigerants and tools.
- Recharge the system only after a successful vacuum test to avoid contamination and poor cooling.
- Regular vacuum testing extends AC lifespan and improves fuel efficiency by reducing strain on the compressor.
Quick Answers to Common Questions
Tip/Question?
Can I use a household vacuum cleaner instead of a pump?
No, household vacuums aren’t strong enough and aren’t designed for refrigerant systems. Always use a dedicated vacuum pump rated for automotive AC work.
Tip/Question?
How long should I run the vacuum pump?
Run it until you reach 29–30 inHg, then monitor for at least 30 minutes. Some systems may need up to 60 minutes to fully evacuate moisture.
Tip/Question?
What if my car doesn’t have service ports?
Most modern cars have them near the compressor or firewall. If missing, consult your service manual or consider having them installed by a professional.
Tip/Question?
Can I skip the vacuum test if I’m just recharging?
No—skipping the test risks moisture contamination and system damage. Always vacuum test before recharging.
Tip/Question?
Is it normal for the gauge to drop slightly at first?
Yes, a small drop is normal as moisture evaporates. But if it keeps rising after 10–15 minutes, investigate for leaks.
Why Vacuum Test a Car AC System?
Vacuum testing is a critical step in maintaining or repairing your car’s air conditioning system. It ensures that the system is free of air, moisture, and contaminants—common culprits behind poor cooling, compressor failure, and unpleasant odors. When moisture mixes with refrigerant, it forms acidic compounds that can damage internal components. Air in the system reduces efficiency and prevents proper pressure balance.
By performing a vacuum test, you confirm that your AC system is sealed and ready for refrigerant. This simple procedure can save you hundreds in repairs and keep your car cool during hot summer drives. Whether you’re recharging after a repair or diagnosing weak airflow, vacuum testing is a must-do.
Tools and Materials Needed
Before starting, gather the right tools to ensure a smooth and safe process. Here’s what you’ll need:
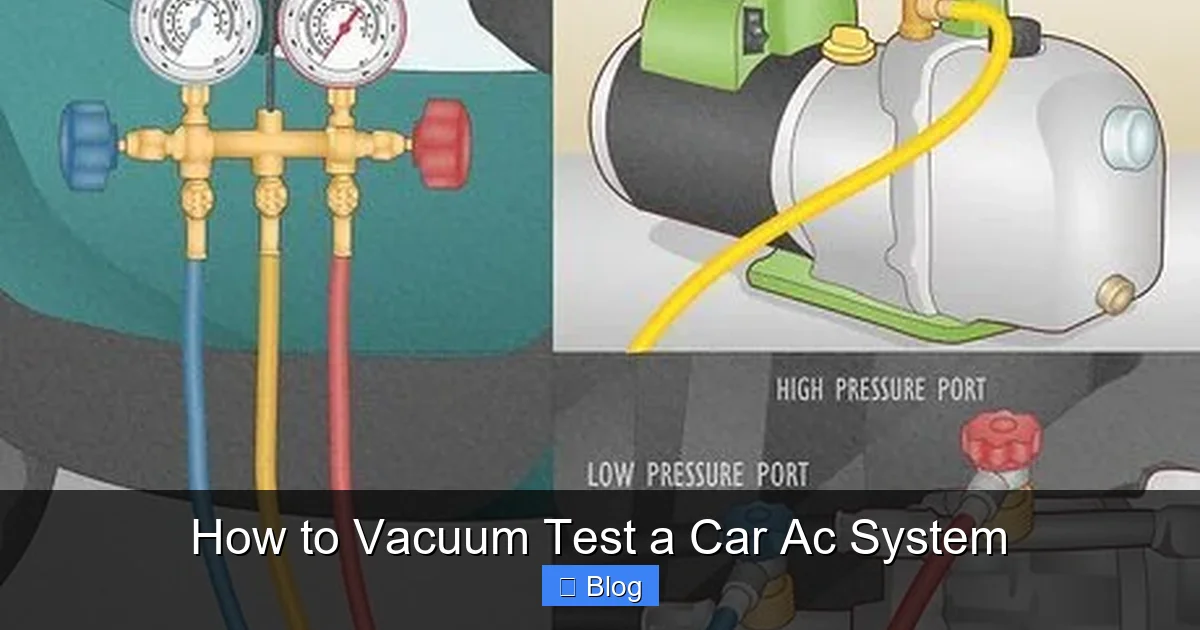
Visual guide about How to Vacuum Test a Car Ac System
Image source: wikihow.com
- Vacuum pump (manual or electric)
- Manifold gauge set (low- and high-pressure hoses)
- Refrigerant recovery machine (if removing existing refrigerant)
- Leak detection kit (optional, for post-test verification)
- Safety gloves and goggles
- Wrench set (for service port connections)
- Shop towels or rags
Most auto parts stores rent vacuum pumps and gauge sets if you don’t own them. Make sure all hoses are in good condition with no cracks or leaks.
Step-by-Step Guide to Vacuum Testing
Follow these steps carefully to perform a proper vacuum test. Rushing can lead to inaccurate results or damage to the system.
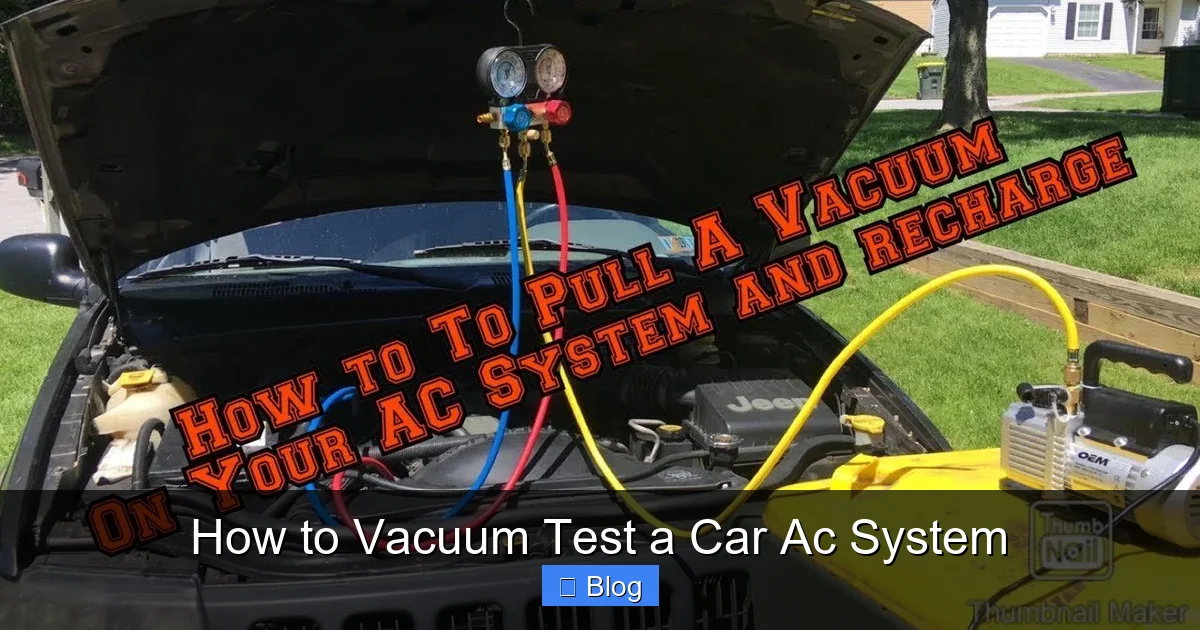
Visual guide about How to Vacuum Test a Car Ac System
Image source: thedailyautomotive.com
Step 1: Prepare the Vehicle
Park your car on a level surface and turn off the engine. Open the hood and locate the low- and high-pressure service ports—usually marked with “L” and “H” or color-coded (blue for low, red for high). Remove the protective caps and clean the ports with a shop towel to prevent dirt from entering the system.
Step 2: Connect the Gauge Set
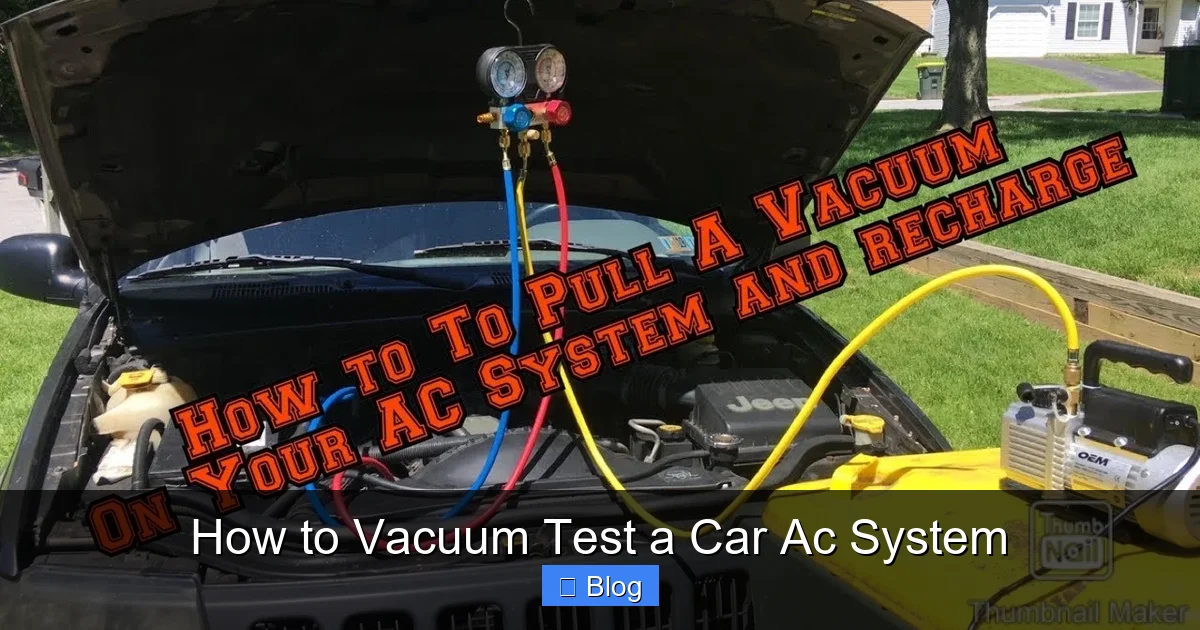
Attach the blue hose from the manifold gauge set to the low-pressure port and the red hose to the high-pressure port. The yellow center hose connects to the vacuum pump. Double-check all connections to ensure they’re tight and secure. Loose fittings will prevent the system from holding a vacuum.
Step 3: Open the Valves on the Gauge Set
Turn both the low- and high-pressure valves on the manifold gauge set to the “open” position. This allows the vacuum pump to pull air from both sides of the AC system simultaneously. If your system has a receiver-drier or accumulator, this ensures it’s also evacuated.
Step 4: Start the Vacuum Pump
Turn on the vacuum pump and monitor the low-pressure gauge. The needle should begin to drop, indicating that air is being removed. Continue running the pump until the gauge reads between 29 and 30 inches of mercury (inHg). This level represents a deep vacuum, essential for removing moisture.
Step 5: Monitor the Vacuum Level
Once the desired vacuum is reached, close the valves on the gauge set and turn off the pump. Watch the gauge closely for at least 30 minutes. A stable reading means the system is airtight. If the pressure rises, there’s likely a leak or moisture still evaporating.
Step 6: Perform a Leak Check (If Needed)
If the vacuum drops, wait another 10–15 minutes. Sometimes moisture takes time to boil off. If the pressure continues to rise, use a leak detection spray or electronic leak detector to find the source. Common leak points include service ports, compressor seals, and O-rings.
Step 7: Break the Vacuum and Disconnect
After confirming the system holds vacuum, slowly open the valves to release the vacuum. Disconnect the hoses in reverse order—yellow first, then blue and red. Replace the service port caps to keep contaminants out.
Tools and Materials
Here’s a quick reference table to help you match tools with their purpose during the vacuum test:
| Tool | Purpose | Estimated Time |
|---|---|---|
| Vacuum pump | Removes air and moisture from the AC system | 30–60 minutes |
| Manifold gauge set | Connects hoses and monitors pressure | 5 minutes (setup) |
| Wrench set | Loosens/tightens service port fittings | 2–3 minutes |
| Safety goggles & gloves | Protects eyes and skin from refrigerant and debris | 1 minute (put on) |
| Leak detection spray | Identifies small leaks in hoses and fittings | 5–10 minutes |
Troubleshooting Common Issues
Even with careful preparation, you might run into problems during the vacuum test. Here’s how to handle the most common issues:
Vacuum Won’t Hold
If the gauge drops after reaching 29 inHg, there’s likely a leak. Recheck all hose connections and service port fittings. Tighten any loose parts. If the problem persists, inspect the compressor shaft seal, condenser, and evaporator for signs of wear or damage.
Pump Takes Too Long to Reach Vacuum
A slow pull may indicate a large leak or excessive moisture. Run the pump longer—up to 90 minutes—to allow moisture to fully evaporate. If it still doesn’t reach 29 inHg, suspect a major leak or a faulty pump.
Gauge Fluctuates Rapidly
Rapid needle movement often means air is entering the system. This could be due to a cracked hose, loose fitting, or a damaged O-ring. Replace faulty components before retrying the test.
Moisture in the Sight Glass (If Equipped)
Some systems have a sight glass on the receiver-drier. If you see bubbles or cloudy fluid during the test, it confirms moisture is present. A full evacuation and replacement of the drier may be necessary.
Safety Tips and Best Practices
Safety should always come first when working with automotive AC systems. Refrigerants can be harmful if inhaled, and high-pressure components can cause injury.
- Always wear safety goggles and gloves.
- Work in a well-ventilated area to avoid inhaling fumes.
- Never open the system if you suspect refrigerant is still present—recover it first.
- Use only approved hoses and fittings to prevent leaks.
- Label hoses clearly to avoid cross-connection.
Following these practices not only protects you but also ensures accurate test results.
When to Recharge the AC System
Only recharge your AC system after a successful vacuum test. Introducing refrigerant into a contaminated or leaky system will lead to poor performance and potential damage. Once the vacuum holds steady for 30 minutes, you can safely add the correct type and amount of refrigerant specified in your vehicle’s manual.
Use a refrigerant scale for precision, and never overfill—too much refrigerant can damage the compressor.
Conclusion
Vacuum testing your car’s AC system is a simple yet powerful way to ensure long-term performance and reliability. By removing air and moisture, you protect critical components and improve cooling efficiency. With the right tools and careful attention to detail, anyone can perform this essential maintenance step.
Whether you’re a DIY enthusiast or a professional mechanic, mastering the vacuum test will save time, money, and frustration. Make it a standard part of your AC service routine, and enjoy cool, comfortable drives all summer long.