How to Vacuum Car Ac System with Pump
Vacuuming your car’s AC system with a pump removes air and moisture, ensuring efficient cooling and preventing damage to components like the compressor. This guide walks you through the process safely and effectively, from gathering tools to troubleshooting issues. Follow these steps to maintain your vehicle’s AC without professional help, saving time and money. (78 words)
How to Vacuum Car Ac System with Pump
Hey there, fellow car enthusiast! If your car’s air conditioning isn’t blowing cold air like it used to, it might be time to vacuum the AC system. Don’t worry—this isn’t as complicated as it sounds. In this guide on how to vacuum car AC system with pump, you’ll learn everything you need to know. We’ll cover why it’s important, what tools to use, and a clear step-by-step process. By the end, you’ll feel confident tackling this DIY job and getting your AC back to chill mode. Whether you’re prepping for summer drives or just maintaining your ride, this will save you trips to the mechanic.
Key Takeaways
- Evacuate moisture first: Vacuuming pulls out water vapor to avoid corrosion and ice buildup in the AC lines.
- Use a quality vacuum pump: A reliable pump achieves deep vacuum levels (under 500 microns) for best results.
- Monitor vacuum time: Run the pump for 30-60 minutes to ensure complete evacuation before adding refrigerant.
- Safety is key: Wear gloves and eye protection, and work in a well-ventilated area to handle refrigerants properly.
- Check for leaks: After vacuuming, hold the vacuum for 15-30 minutes; a drop indicates a leak needing repair.
- DIY savings: This process can cost under $100 in tools, versus $200+ at a shop.
Quick Answers to Common Questions
How long should I vacuum?
Run the pump for 30-60 minutes to achieve a deep vacuum. Monitor gauges closely—stop when you hit 500 microns or lower for best moisture removal.
Can I reuse old refrigerant?
No, always recover and dispose of old refrigerant properly per EPA rules. Use fresh stuff to avoid contaminants in your system.
What’s the best vacuum pump for beginners?
Go for a 2-3 CFM model from brands like Robinair or JB Industries. It’s affordable, reliable, and handles most passenger cars easily.
Do I need to remove the receiver-drier?
Usually not, but if it’s old or contaminated, replace it during evacuation to prevent future clogs and extend AC life.
Is this safe for hybrid cars?
Yes, but consult your manual—hybrids have sensitive systems. Disconnect the battery and follow OEM guidelines to avoid electrical issues.
Why Vacuum Your Car’s AC System?
Before we dive into the how-to, let’s talk about the why. Your car’s AC system is a sealed unit that circulates refrigerant to cool the cabin. Over time, air and moisture can sneak in through leaks or during repairs. This contamination leads to problems like reduced cooling efficiency, compressor strain, or even system failure. Vacuuming, or evacuating the system, uses a pump to remove that air and moisture, creating a deep vacuum. It’s like giving your AC a clean slate before recharging with refrigerant.
Skipping this step can cause acid formation or ice blockages, shortening the life of expensive parts. Pros do it every time they service an AC, and now you can too. It’s a straightforward task that boosts performance and prevents costly fixes down the road.
Tools and Materials Needed
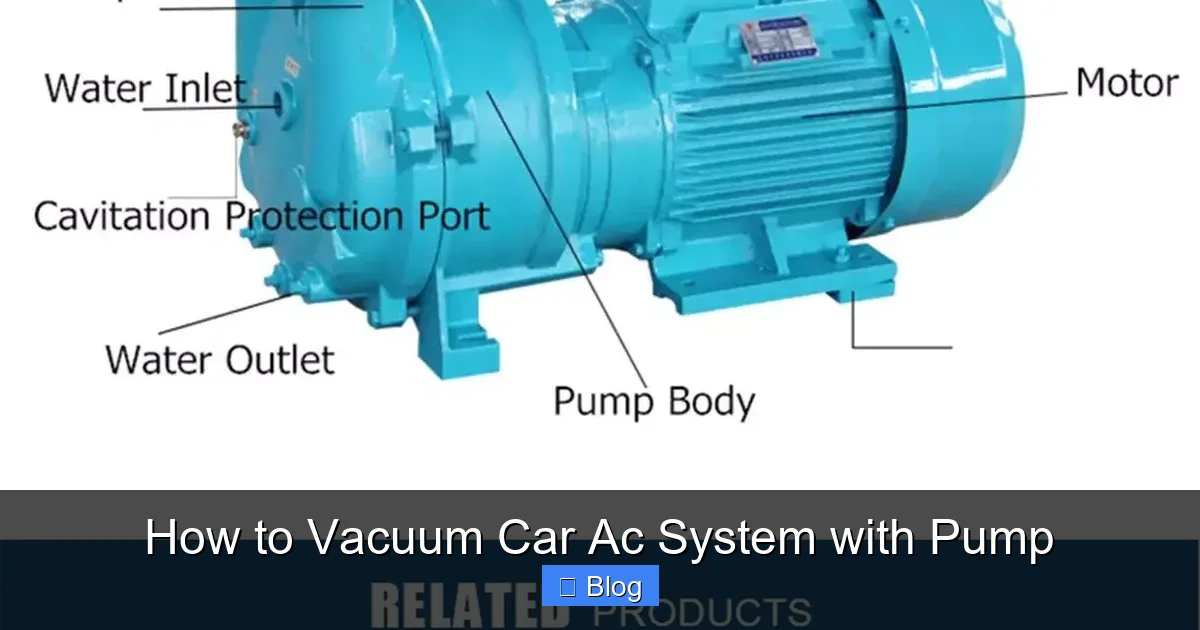
To get started on how to vacuum car AC system with pump, you’ll need the right gear. Don’t skimp here—quality tools make the job safer and more effective. Most of these are affordable and reusable for other auto tasks.
Visual guide about How to Vacuum Car Ac System with Pump
Image source: i.pinimg.com
Here’s a quick rundown of essentials. A vacuum pump is the star, but gauges and hoses are crucial for monitoring pressure. Safety items like gloves keep you protected from oils and refrigerants.
With these in hand, you’re set. Buy a kit if you’re new to this—it often bundles the pump, gauges, and hoses for around $100-200. Always check your car’s manual for specific refrigerant type to avoid mismatches.
Preparing Your Vehicle and Workspace
Safety first! Before jumping into how to vacuum car AC system with pump, prep your space and car. Park on a flat, level surface in a garage or shaded area. Engine off, keys out—never work on a hot system to avoid burns or pressure releases.
Visual guide about How to Vacuum Car Ac System with Pump
Image source: i.pinimg.com
| Tool/Material | Purpose | Recommended Specs |
|---|---|---|
| Vacuum Pump | Creates deep vacuum to remove air and moisture | 2-5 CFM, capable of 15-25 microns |
| Manifold Gauge Set | Connects to system and monitors vacuum levels | With low/high-side hoses, R-134a compatible |
| AC Hoses and Adapters | Links pump to service ports on the car | Quick-connect fittings for your vehicle model |
| Vacuum Gauge | Measures vacuum depth precisely | Digital or analog, reads down to 500 microns |
| Safety Gloves and Goggles | Protects against refrigerant exposure | Nitrile gloves, ANSI-rated eyewear |
| Refrigerant (optional for recharge) | Fills system after vacuuming | R-134a or R-1234yf, per your car’s specs |
| Thread Sealant Tape | Prevents leaks at connections | PTFE tape for fittings |
Step 1: Gather Safety Gear
Put on gloves and goggles. Open nearby windows for ventilation. If you’re dealing with older systems, refrigerant like R-12 can be hazardous—handle with care or consult a pro.
Step 2: Locate AC Service Ports
Pop the hood and find the low-pressure (larger) and high-pressure (smaller) ports. They’re usually near the compressor or accumulator, capped with plastic covers. Clean around them with a rag to prevent dirt entry. Note: Low-side is for vacuuming; high-side stays capped unless specified.
Step 3: Inspect for Leaks
Do a quick visual check. Look for oily residue around hoses or fittings—that’s a leak sign. If you spot one, fix it first with new O-rings or tape. A leaky system wastes vacuum time and refrigerant.
Pro tip: Warm up the engine briefly if needed to equalize pressures, but turn it off before connecting tools. This prep takes 10-15 minutes but saves headaches later.
Step-by-Step Guide to Vacuuming the AC System
Now for the main event. Follow these steps carefully on how to vacuum car AC system with pump. The whole process takes 1-2 hours, depending on system size. Take your time—rushing leads to errors.
Step 1: Connect the Manifold Gauges
Attach the blue hose (low-side) to your car’s low-pressure port. The red hose goes unused for vacuuming. Connect the yellow hose from the manifold to your vacuum pump’s inlet. Double-check connections are snug; use thread tape if needed.
Example: On a Honda Civic, the low port is near the firewall. Twist gently—don’t force it. Open the manifold valves slowly to avoid sudden pressure drops.
Step 2: Set Up the Vacuum Pump
Place the pump on a stable surface away from moving parts. Plug it in or ensure battery charge if cordless. Prime the pump by running it briefly without connections to clear oil. Attach the vacuum gauge to the manifold if separate.
Practical tip: Elevate the car slightly if accessing ports is tricky. Use jack stands for safety—never rely on a jack alone.
Step 3: Start the Vacuum Process
Turn on the pump. Open the low-side manifold valve fully. Watch the gauges: Pressure should drop quickly to -30 inHg, then hold steady. Run for 30-60 minutes to reach a deep vacuum (500 microns or lower on a micron gauge).
Listen for the pump’s hum—it should be consistent. If it sputters, check for blockages. Example: For a small sedan, 45 minutes often suffices; trucks may need longer due to larger lines.
Step 4: Monitor and Hold the Vacuum
Once at target vacuum, close the manifold valve and turn off the pump. Wait 15-30 minutes. If levels hold, your system is leak-free. A rise means air is entering—trace and fix the leak.
Tip: In humid weather, extend hold time to ensure all moisture evaporates. This step confirms your work’s success before recharging.
Step 5: Disconnect and Recharge (Optional)
With vacuum held, disconnect hoses starting from the pump. If recharging, connect refrigerant canister to the yellow hose. Open valves per your gauge readings—add slowly to avoid overfill. Start the engine and AC on max for even distribution.
Warning: Overcharging stresses the compressor. Use exact amounts from your manual, like 24-28 oz for many sedans.
Troubleshooting Common Issues
Even with careful steps in how to vacuum car AC system with pump, things can go wrong. Here’s how to fix them.
Pump Won’t Create Vacuum: Check connections for leaks or blockages. Ensure the pump is oiled—add vacuum pump oil if low. If faulty, test on another system.
Vacuum Levels Drop Quickly: This screams leaks. Use soapy water on fittings to spot bubbles. Replace damaged O-rings or hoses. Recheck ports for cracks.
AC Still Not Cooling Post-Vacuum: You might have evacuated but not recharged properly. Verify refrigerant amount and type. Could be a deeper issue like a bad compressor—get a pro diagnostic.
Pump Overheats: Pause every 20 minutes in hot weather. Clean filters and ensure good airflow around the unit.
Example: I once had a slow vacuum on an older Ford due to a clogged accumulator. Flushing it fixed the issue instantly. If troubleshooting overwhelms, stop and call a mechanic—better safe than sorry.
Regular maintenance like this every 2-3 years keeps issues at bay. Track your work in a log for future reference.
Conclusion
There you have it—a complete rundown on how to vacuum car AC system with pump. You’ve learned the importance of evacuation, gathered the tools, and followed safe steps to refresh your AC. This DIY approach not only restores cool air but empowers you as a car owner. Remember, practice makes perfect, so start with a simple job like this. Your vehicle will thank you with reliable performance on those hot days. If you run into snags, local auto forums or pros are great resources. Drive cool!
(Word count: 1624)