How to Vacuum Small Spaces in Car
Struggling to clean tight car crevices? This guide shows you how to vacuum small spaces in your car using the right tools and techniques. Get every nook spotless—fast and easy.
Keeping your car clean isn’t just about looks—it’s about comfort, hygiene, and resale value. While most people focus on vacuuming seats and floors, the real challenge lies in cleaning small, hard-to-reach spaces. Crumbs, dust, pet hair, and dirt love to hide in cup holders, seat tracks, air vents, door pockets, and between console panels. If left unchecked, these tiny areas can become breeding grounds for odors and bacteria.
In this guide, you’ll learn exactly how to vacuum small spaces in your car effectively. Whether you drive a compact hatchback or a full-size SUV, these step-by-step methods will help you reach every crevice with confidence. We’ll cover the best tools, smart techniques, and pro tips to make car cleaning faster and more thorough—without damaging delicate surfaces.
Key Takeaways
- Use the right nozzle: A crevice tool or brush attachment reaches tight spots like cup holders and seat gaps.
- Work in sections: Tackle one area at a time to avoid missing hidden debris.
- Shake out debris first: Remove loose trash by hand or with a soft brush before vacuuming.
- Go slow and steady: Rushing can push dirt deeper—move the nozzle gently for best results.
- Maintain your vacuum: Empty the dustbin and clean filters regularly for peak suction power.
- Protect delicate surfaces: Use low suction or a soft brush on electronics and trim to avoid damage.
- Finish with a wipe: Follow vacuuming with a microfiber cloth to capture leftover dust.
Quick Answers to Common Questions
Tip/Question?
Should I vacuum when the car is hot or cold?
Always vacuum when the car is cool. Heat can make plastics and adhesives softer, increasing the risk of damage from suction or tools.
Tip/Question?
Can I use a regular vacuum cleaner for my car?
Yes, but only if it has the right attachments and a long enough cord. Handheld or cordless models are usually more convenient for car use.
Tip/Question?
How often should I vacuum small spaces in my car?
Aim for once a week if you eat in the car or have pets. Otherwise, every two weeks is sufficient for most drivers.
Tip/Question?
Is it safe to vacuum around airbags?
Yes, but avoid direct contact with airbag covers. Use low suction and a soft brush to prevent damage.
Tip/Question?
What’s the best way to clean leather seat crevices?
Use a soft brush attachment on low suction, followed by a leather-safe cleaner and conditioner to maintain the material.
Step 1: Gather the Right Tools
Before you start, make sure you have the right equipment. A standard household vacuum might not cut it for tight car spaces. Here’s what you’ll need:
Choose a Compact or Cordless Vacuum
Opt for a handheld or cordless vacuum designed for car cleaning. These are lightweight, portable, and often come with specialized attachments. Models like the Black+Decker Dustbuster or Dyson V7 Car+Boat are excellent choices. If you prefer a corded option, ensure the cord is long enough to reach all areas of your vehicle.
Use the Right Attachments
Most car vacuums include several nozzles. The most useful for small spaces are:
- Crevice tool: Long and narrow, perfect for seat gaps and between console panels.
- Brush attachment: Soft bristles gently lift dust from vents and fabric surfaces.
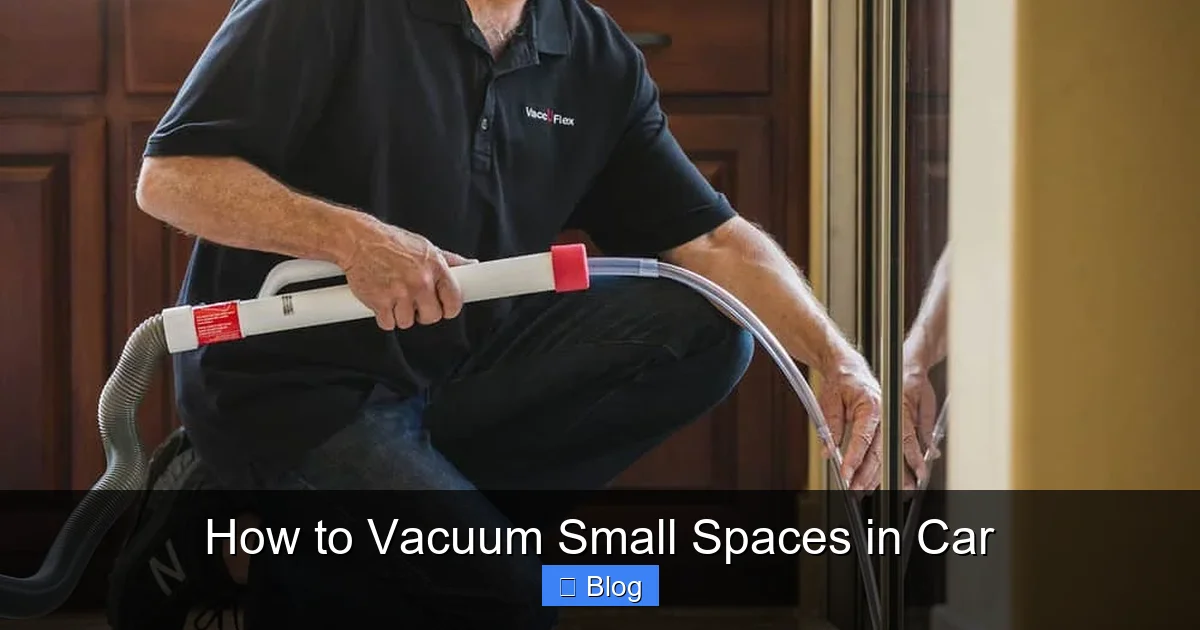
- Flexible hose: Adds reach and maneuverability in tight corners.
Supplement with Manual Tools
Sometimes vacuuming alone isn’t enough. Keep these on hand:
- A soft-bristle detailing brush (for loosening stuck debris)
- Compressed air (to blow out dust from vents)
- Microfiber cloths (for final wipe-downs)
- Tweezers or a toothpick (for removing stubborn debris from deep crevices)
Step 2: Prepare Your Car for Cleaning
Preparation makes vacuuming more effective and less frustrating.
Remove Trash and Loose Items
Start by taking out all removable items: floor mats, trash, phone chargers, water bottles, and personal belongings. Shake out floor mats outside to remove loose dirt. This gives you clear access to every surface.
Visual guide about How to Vacuum Small Spaces in Car
Image source: everydaycheapskate.com
Shake Out Seats and Carpets
Give seats and carpets a firm shake or tap to dislodge crumbs and dust trapped deep in the fibers. Do this outside if possible to avoid spreading debris back into the car.
Open All Doors and Compartments
Open doors, glove boxes, and center consoles fully. This exposes hidden areas like door pockets, seat tracks, and under-seat storage. It also improves airflow, helping the vacuum work more efficiently.
Step 3: Vacuum in a Systematic Order
Working methodically ensures you don’t miss any spots.
Start from the Top
Begin with the dashboard, air vents, and overhead console. Use the brush attachment to gently vacuum dust from vents and crevices. Tilt vents to access deeper areas. For tight spaces around buttons and dials, use short bursts of suction or a detailing brush.
Visual guide about How to Vacuum Small Spaces in Car
Image source: everydaycheapskate.com
Move to the Seats
Vacuum seat cushions, backs, and headrests using the upholstery tool. Pay special attention to the seams and crevices where crumbs accumulate. For leather seats, use low suction to avoid scratching. For fabric seats, go over each section twice—once horizontally, once vertically.
Clean the Floor and Footwells
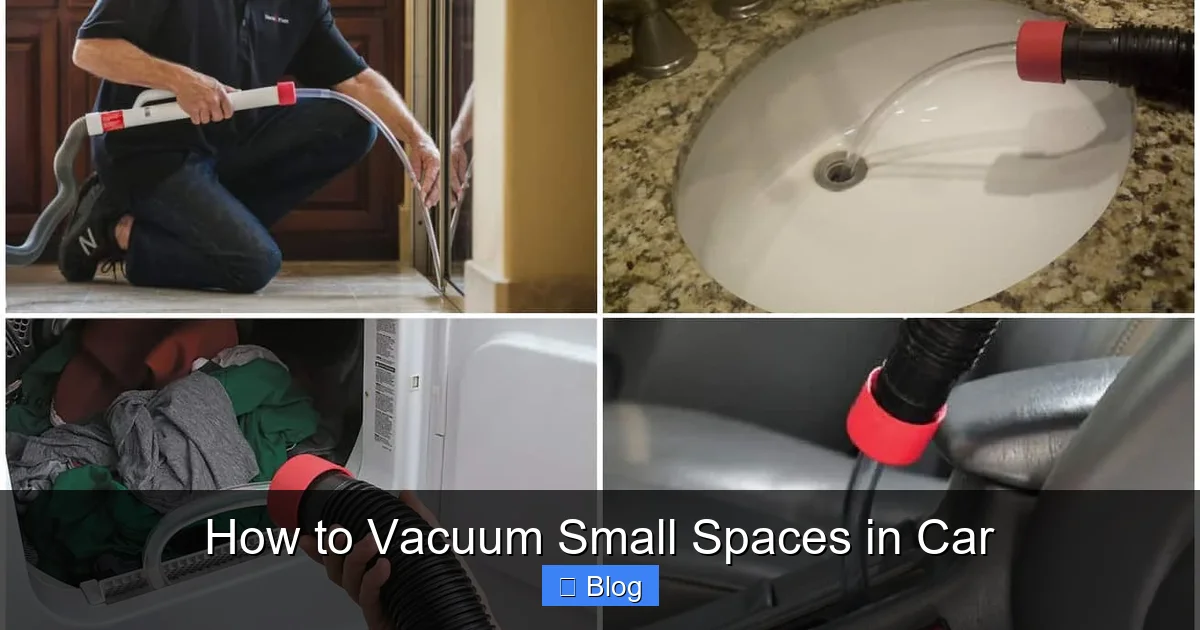
Use the crevice tool to reach under seats and along the edges of the footwells. Lift seat bottoms slightly (if adjustable) to access hidden debris. Don’t forget the dead pedal area and behind the pedals.
Tackle Small Spaces and Crevices
This is where most people struggle. Use the crevice tool to clean:
- Between front and rear seats
- Inside cup holders (remove inserts if possible)
- Door pockets and armrest storage
- Seat track grooves
- Under the glove box and center console
Tools and Materials
Here’s a quick reference table to help you choose the right tool for each cleaning task. This ensures you’re using the most effective method without damaging your car’s interior.
| Cleaning Area | Best Tool | Why It Works |
|---|---|---|
| Seat gaps and crevices | Crevice tool | Narrow design reaches deep into tight spaces |
| Air vents and dashboard | Brush attachment | Soft bristles lift dust without scratching |
| Cup holders | Crevice tool + compressed air | Removes sticky residue and hidden debris |
| Seat tracks | Crevice tool + detailing brush | Loosens and extracts dirt from narrow grooves |
| Door pockets | Flexible hose + crevice tool | Reaches deep corners and bends |
Step 4: Use Smart Techniques for Tight Spots
Even with the right tools, technique matters.
Angle the Nozzle Correctly
Insert the crevice tool at a slight angle to maximize suction contact. Avoid pushing straight in—this can block airflow. Wiggle the nozzle gently as you move it back and forth.
Use Short, Controlled Movements
Long strokes can miss debris. Instead, use short, overlapping passes. This ensures full coverage, especially in irregularly shaped areas like cup holders.
Combine Vacuuming with Manual Cleaning
For sticky spills or packed-in grime, vacuum first, then use a damp microfiber cloth or cotton swab. Dry immediately to prevent moisture damage.
Blow Out Stubborn Dust
If dust won’t budge, use compressed air to blow it out of vents or crevices, then vacuum it up. This is especially useful for electronics and climate control systems.
Step 5: Finish with a Final Wipe-Down
Vacuuming lifts most debris, but a final wipe ensures a truly clean interior.
Use Microfiber Cloths
Wipe down all hard surfaces—dashboard, console, door panels—with a dry or slightly damp microfiber cloth. This picks up fine dust that the vacuum missed.
Clean Cup Holders and Storage Compartments
Remove inserts and wash them with mild soap and water. Dry thoroughly before replacing. Wipe the interior with a disinfectant wipe to eliminate bacteria.
Check for Missed Spots
Run your fingers along seat seams, door edges, and under the dashboard. If you feel grit, go back with the crevice tool.
Troubleshooting Common Issues
Even with the best methods, you might run into problems.
Low Suction Power?
Check the vacuum’s dustbin—it may be full. Also, clean or replace the filter. Clogged filters reduce airflow and weaken suction.
Dirt Keeps Getting Pushed Deeper?
You’re likely moving too fast. Slow down and use shorter strokes. If debris is stuck, loosen it first with a brush or compressed air.
Scratches on Plastic or Trim?
You’re using too much suction or a hard attachment. Switch to a soft brush and reduce power. Avoid metal tools near delicate surfaces.
Pet Hair Won’t Come Out?
Use a rubber glove or pet hair roller to lift hair before vacuuming. The rubber creates static that grabs hair fibers.
Conclusion
Vacuuming small spaces in your car doesn’t have to be a frustrating chore. With the right tools, a systematic approach, and a few smart techniques, you can keep every nook and cranny spotless. Start by preparing your car, use the correct attachments for each area, and always finish with a wipe-down. Regular maintenance—even just 10 minutes a week—can make a huge difference in your car’s cleanliness and comfort.
Remember, consistency is key. The more often you clean, the less buildup you’ll have to deal with. And by following this guide, you’ll not only improve your car’s appearance but also extend the life of your interior materials. So grab your vacuum, pick a quiet afternoon, and give your car the detailed care it deserves.