What Is a Vacuum Leak in a Car Engine?
A vacuum leak in a car engine occurs when unmetered air enters the engine’s intake system, disrupting the air-fuel mixture. This can cause the engine to run inefficiently, leading to rough idling, stalling, or poor acceleration. Essentially, a vacuum leak prevents the engine from getting the correct balance of air and fuel, which is crucial for optimal performance.
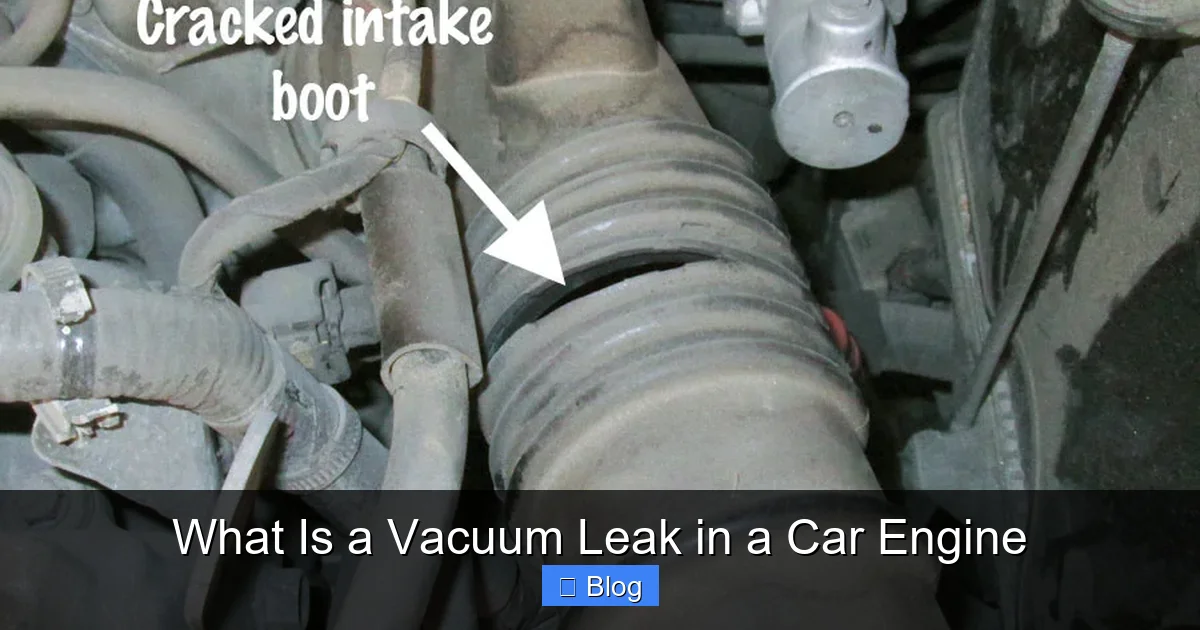
Common causes of a vacuum leak include cracked or disconnected hoses, faulty gaskets, or issues with the intake manifold. Drivers may notice a hissing sound coming from the engine bay, reduced fuel efficiency, or the check engine light turning on. Identifying and fixing a vacuum leak quickly is important because prolonged driving with one can strain engine components and reduce overall performance.
Mechanics often use diagnostic tools like smoke machines or pressure tests to locate leaks accurately. Understanding what a vacuum leak is and recognizing its symptoms helps maintain engine health and prevents costly repairs down the road.
What Is a Vacuum Leak in a Car Engine?
Ever started your car and noticed it just doesn’t feel right? Maybe the engine idles a bit rough, struggles to accelerate, or that dreaded Check Engine Light (CEL) suddenly pops on. While many things can cause these symptoms, one common culprit that often goes overlooked is a vacuum leak in a car engine.
Don’t worry, it sounds more complicated than it is! This comprehensive guide is designed to demystify what a vacuum leak is, why it’s a problem, and most importantly, how you can identify and potentially fix it yourself. We’ll walk you through everything you need to know, from understanding your car’s vacuum system to practical steps for diagnosis and repair. By the end, you’ll have a clear understanding and the confidence to tackle this common automotive issue.
Key Takeaways
- Understanding Vacuum Leaks: A vacuum leak in a car engine allows unmetered air into the combustion process, upsetting the vital air-fuel mixture the engine needs to run efficiently.
- Common Symptoms: Watch out for rough or erratic idling, an audible hissing sound from the engine bay, reduced engine power, poor fuel economy, and the illumination of your Check Engine Light (CEL), often with specific trouble codes.
- Typical Locations: Vacuum leaks frequently originate from cracked or disconnected vacuum hoses, deteriorated intake manifold gaskets, faulty PCV valves, or compromised brake booster diaphragms.
- Diagnosis Methods: You can often find leaks through careful visual inspection, listening for sounds, using the spray test (with caution), or employing more professional tools like a smoke machine.
- Importance of Timely Repair: Addressing a vacuum leak promptly prevents further engine damage, restores optimal performance and fuel efficiency, and helps your car pass emissions tests.
- DIY vs. Professional Help: Many minor vacuum leaks can be fixed by DIY enthusiasts, but complex cases or those requiring specialized tools are best left to certified mechanics.
Quick Answers to Common Questions
What’s the easiest sign of a vacuum leak?
The easiest and most common sign of a vacuum leak is a rough or erratic engine idle, often accompanied by a distinct hissing or whistling sound coming from the engine bay when the car is running.
Is it okay to drive with a vacuum leak?
While you can technically drive with a minor vacuum leak, it’s not recommended. It will cause reduced performance, poor fuel economy, increased emissions, and can potentially lead to more serious, costly engine damage over time, especially to components like the catalytic converter.
Can I use soapy water to find a vacuum leak?
Soapy water is generally used to find air leaks in pressurized systems (like tires or some exhaust systems) rather than vacuum leaks. For vacuum leaks, a spray test with carb cleaner or an unlit propane torch is more effective as it’s drawn into the engine, causing an RPM change.
How much does it usually cost to fix a vacuum leak?
The cost varies greatly. A simple fix, like replacing a cracked vacuum hose, might only be the cost of the hose (a few dollars) and your time. More complex issues, like replacing an intake manifold gasket, could range from $200-$600+ at a shop, depending on the vehicle and labor involved.
What role does the PCV valve play in vacuum?
The PCV (Positive Crankcase Ventilation) valve uses engine vacuum to draw harmful blow-by gases from the crankcase back into the intake manifold to be re-burned. If the PCV valve or its connecting hoses leak, it can create a significant vacuum leak in the engine, affecting performance and emissions.
What Exactly Is a Vacuum Leak?
To understand a vacuum leak, we first need to understand engine vacuum. Inside your car’s engine, as the pistons move up and down, they create areas of low pressure, or “vacuum,” within the intake manifold. This vacuum is vital. It’s not just for making the engine run; it powers many important systems in your car, such as:
- Brake Booster: Helps you press the brake pedal with less effort.
- PCV Valve (Positive Crankcase Ventilation): Reroutes harmful crankcase gases back into the engine to be burned, reducing emissions.
- HVAC Controls: Often helps direct airflow for your heating and air conditioning system.
- EGR Valve (Exhaust Gas Recirculation): Helps reduce NOx emissions.
- Fuel Pressure Regulator: Helps maintain consistent fuel pressure.
Think of your engine’s intake system like a giant straw. When the engine is running, it’s constantly “sucking” in air. This air is carefully measured by a sensor (usually the Mass Air Flow, or MAF, sensor) before it enters the engine. This measurement is crucial because your engine computer (ECU) uses it to calculate the perfect amount of fuel to inject for optimal combustion.
A vacuum leak in a car engine happens when unmetered, or “extra,” air gets into the intake system through a crack, loose connection, or faulty seal after the MAF sensor has done its job. Because this extra air wasn’t measured, the engine’s computer thinks it has less air than it actually does. So, it injects less fuel, leading to a “lean” air-fuel mixture (too much air, not enough fuel). This lean condition is what causes all sorts of trouble.
Why Are Vacuum Leaks Such a Problem?
While a vacuum leak might seem like a minor thing, its impact can be significant. Here’s why you shouldn’t ignore a vacuum leak in a car engine:
Visual guide about What Is a Vacuum Leak in a Car Engine
Image source: images.nexusapp.co
- Poor Engine Performance: A lean air-fuel mixture prevents the engine from burning fuel efficiently. This directly translates to reduced horsepower, sluggish acceleration, and a generally underperforming car.
- Rough Idling: This is one of the most common and noticeable symptoms. Your engine might shake, hesitate, or rev unevenly when sitting still at a stoplight.
- Increased Emissions: An improperly burning engine produces more pollutants, making your car less eco-friendly and potentially causing it to fail emissions tests.
- Check Engine Light (CEL): The ECU is smart. When it detects a lean condition or other issues caused by a vacuum leak, it will trigger the CEL and store diagnostic trouble codes (DTCs) like P0171 or P0174 (System Too Lean Bank 1 or 2).
- Reduced Fuel Economy: Your engine has to work harder to produce power with a lean mixture, meaning it consumes more fuel than usual.
- Potential Engine Damage: In severe cases, a consistently lean condition can cause engine components, like the catalytic converter, to overheat and fail prematurely, leading to very costly repairs.
Common Symptoms of a Vacuum Leak
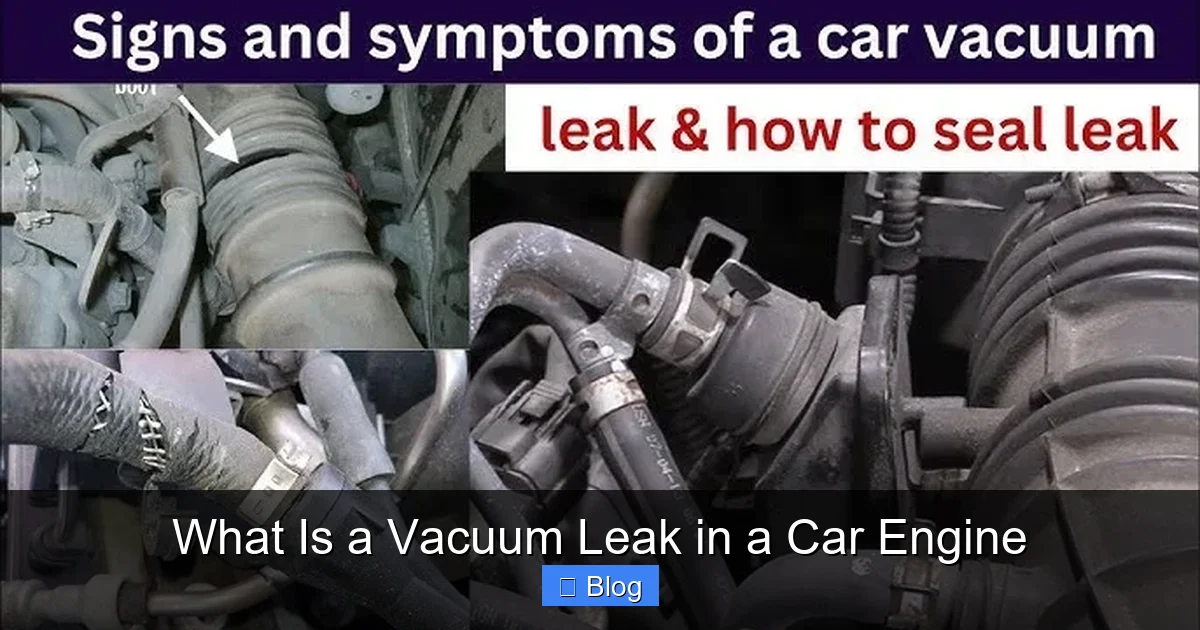
Knowing the signs is the first step in diagnosing a vacuum leak. Keep an ear and an eye out for these tell-tale symptoms:
Visual guide about What Is a Vacuum Leak in a Car Engine
Image source: automotivian.com
- Rough or Erratic Idle: This is often the first symptom people notice. The engine might shake, stumble, or have fluctuating RPMs when it’s supposed to be steady.
- Hissing or Whistling Sounds: With the engine running, especially at idle, listen carefully under the hood. A vacuum leak can produce a distinct sucking, hissing, or whistling sound as air is drawn into the system.
- Check Engine Light (CEL): As mentioned, the CEL will often illuminate. An OBD-II scanner can confirm codes like P0171 (System Too Lean Bank 1) or P0174 (System Too Lean Bank 2).
- Loss of Power or Acceleration: Your car might feel sluggish, especially when accelerating or going uphill.
- Poor Fuel Economy: You’ll be filling up more often than usual because the engine is running inefficiently.
- Stalling: In severe cases, especially when coming to a stop, the engine might stall completely.
- Hard Starting: The car might crank longer than usual before starting.
- Engine Misfires: A lean mixture can sometimes lead to cylinders misfiring.
Tools You Might Need
Before you dive in, gather these tools. Safety first!
- Safety Glasses and Gloves: Always protect your eyes and hands.
- Flashlight: Essential for seeing into dark engine bays.
- OBD-II Scanner: To read trouble codes and clear them after repair.
- Carburetor Cleaner or Non-Flammable Brake Cleaner: (Use with extreme caution! See safety warning below.)
- Unlit Propane Torch (Optional, for propane test): Provides a safer, less flammable vapor.
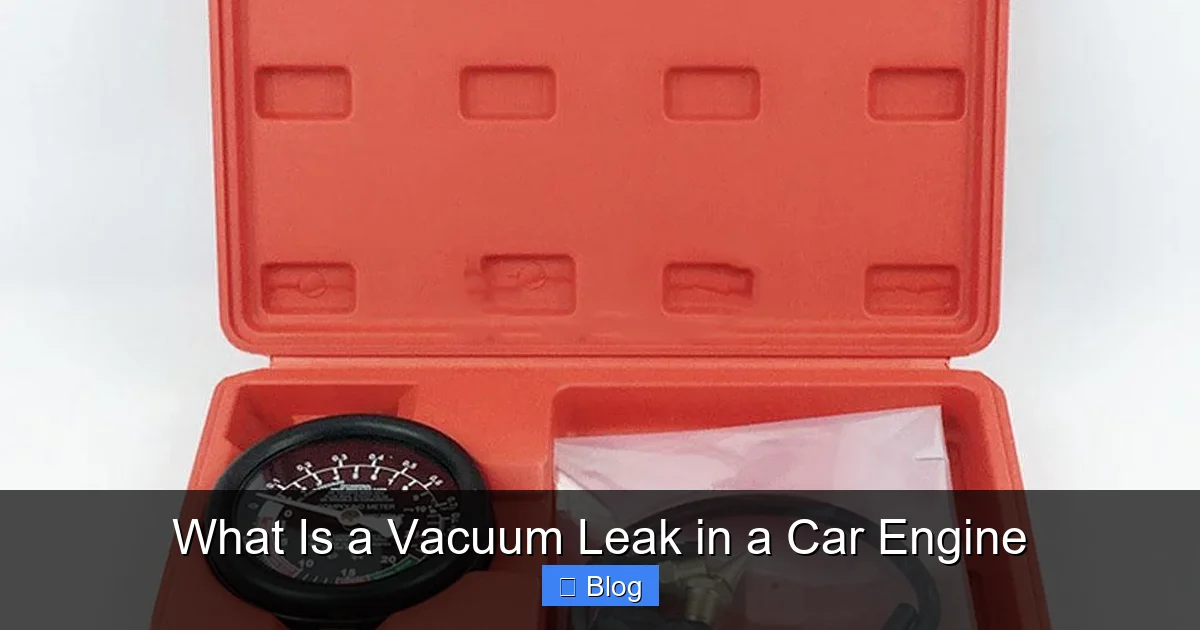
- Smoke Machine (Optional, professional grade): The most effective way to find stubborn leaks.
- Mechanic’s Stethoscope or Long Vacuum Hose: To pinpoint sounds.
- Basic Hand Tools: Screwdrivers, pliers, socket set for removing covers or loosening clamps.
Step-by-Step Guide: How to Find a Vacuum Leak
Finding a vacuum leak in a car engine requires patience and a systematic approach. Here’s how to do it:
Step 1: Safety First!
- Always ensure your car is on a level surface with the parking brake engaged.
- Let the engine cool down completely before working on it, especially before using any flammable sprays.
- Wear your safety glasses and gloves.
- Ensure good ventilation in your work area.
Step 2: Visual Inspection – The Easiest Start
Often, a vacuum leak is visible. Pop the hood and start looking:
- Check Vacuum Hoses: Look for cracked, brittle, or disconnected hoses. These are usually small, rubber or plastic lines running all over the engine bay, connecting various components. Follow them carefully.
- Inspect Vacuum Caps: Many unused vacuum ports have rubber caps on them. These can crack or fall off over time, creating a leak.
- Examine the PCV Valve and Hoses: The PCV valve itself or its connecting hoses can crack or become clogged.
- Look at the Intake Manifold Gasket Area: This is where the intake manifold bolts to the engine block. The gasket can harden and crack, creating a leak.
- Brake Booster Hose: Inspect the large hose going from the intake manifold to the brake booster for cracks or loose connections.
Wiggle hoses gently to see if any are loose or crumbling. Sometimes, simply pushing a hose back onto its fitting is all it takes!
Step 3: Listen for the Leak
With the engine running (and still cool if possible for safety, though some leaks only appear when warm), listen intently under the hood. A distinct hissing, whistling, or sucking sound is a strong indicator of a vacuum leak. Use a mechanic’s stethoscope or even a long piece of rubber hose held to your ear to help pinpoint the exact location of the sound. Move it slowly around suspected areas.
Step 4: The Spray Test (Use with Extreme Caution!)
This is a popular method but comes with serious safety warnings. You’ll use a flammable substance to detect changes in engine RPM.
- Materials: Carburetor cleaner, starting fluid, or non-flammable brake cleaner (some non-flammable brake cleaners work, but check the label).
- Procedure:
- Start the engine and let it idle.
- Spray very short bursts of the cleaner around suspected vacuum leak areas. These include:
- All vacuum hoses and their connections.
- The base of the intake manifold where it meets the cylinder head.
- Around the PCV valve and its grommet.
- Around the throttle body gasket.
- The brake booster connection.
- Listen Carefully: If you spray near a vacuum leak, the engine will momentarily suck in the flammable cleaner, causing a temporary increase in RPMs or a change in engine idle quality. This change indicates the location of the leak.
- ⚠ CRITICAL SAFETY WARNINGS:
- Flammability: Carb cleaner and starting fluid are highly flammable. Do NOT spray near hot exhaust manifolds, open flames, or sparks. Have a fire extinguisher handy.
- Ventilation: Ensure you are in a well-ventilated area to avoid inhaling fumes.
- Hot Engine Components: The engine can get very hot. Avoid spraying on hot parts to prevent flash fires.
- Small Bursts Only: Use very short, controlled sprays. You don’t want to flood the engine or create a large vapor cloud.
- Non-Flammable Option: If you’re uncomfortable with flammable sprays, some non-flammable brake cleaners can also work by temporarily blocking the leak, causing the RPMs to drop slightly instead of rise. Always test in a safe area first.
Step 5: The Propane or Smoke Test (More Professional Approaches)
- Propane Test:
- Using an unlit propane torch (the kind used for soldering), open the valve slightly.
- Move the torch nozzle (without lighting it!) slowly around suspected leak areas.
- If the engine RPMs increase, the engine is drawing in propane through the leak, indicating its location.
- This is generally safer than spray tests as propane is lighter than air and dissipates more quickly, but still requires caution regarding flammability.
- Smoke Machine:
- This is the most effective and safest method for finding vacuum leaks but requires specialized equipment.
- A smoke machine pumps non-toxic smoke into the intake system (usually through a vacuum line or the intake boot).
- The smoke will visibly escape from any leak point, making it easy to spot.
- Many professional mechanics use this method. If you can’t find the leak, a shop with a smoke machine can usually pinpoint it quickly.
Step 6: Check Components Connected to Vacuum
Don’t forget the components themselves that utilize engine vacuum:
- Brake Booster: With the engine off, pump the brake pedal several times until it feels firm. Start the engine while keeping pressure on the pedal. If the pedal drops slightly, the booster is likely okay. If it doesn’t, or you hear a hissing from the pedal area, the booster or its check valve could be leaking.
- PCV Valve: Remove the PCV valve (often twists out of a grommet). Shake it; if it rattles, it’s usually good. If it doesn’t, it might be stuck closed. Also, check its grommet for cracks.
- EGR Valve: Some EGR valves are vacuum-controlled. Visually inspect the vacuum line going to it.
- EVAP System: The evaporative emissions system also uses vacuum. Leaks here can cause “EVAP leak” codes, which sometimes mimic vacuum leak symptoms.
What to Do Once You Find a Leak
Congratulations, you’ve found the culprit! Now it’s time for the fix:
- Replace Cracked Hoses: This is often the simplest fix. Cut a new piece of vacuum hose to the correct length and replace the old one. Use good quality, automotive-grade vacuum hose.
- Tighten Clamps: If a hose connection is just loose, tighten the clamp.
- Replace Gaskets and O-rings: If the leak is from an intake manifold gasket, throttle body gasket, or a PCV valve grommet, you’ll need to replace the specific gasket or O-ring. This might require removing other components, so consult your car’s service manual or an online tutorial.
- Replace Faulty Components: If a component like the PCV valve, brake booster, or an emissions solenoid is leaking internally or externally, it will need to be replaced.
Always use quality replacement parts. Once repaired, clear any trouble codes with your OBD-II scanner. Drive the car for a bit to see if the symptoms are gone and if the CEL stays off.
Why Timely Repair is Crucial
Ignoring a vacuum leak is like ignoring a small cut that could get infected. Over time, a persistent lean condition caused by a vacuum leak can lead to:
- Catalytic Converter Damage: Unburnt fuel due to misfires or a lean condition can overheat and destroy your catalytic converter, a very expensive repair.
- Engine Overheating: While less common, a very lean mixture can increase combustion temperatures.
- Spark Plug Fouling: Irregular combustion can lead to carbon buildup on spark plugs.
- Failed Emissions Tests: Your car simply won’t pass without a proper air-fuel mixture.
Fixing a vacuum leak promptly saves you money in the long run by preventing more serious problems and restoring your car’s efficiency.
When to Call a Professional
While many vacuum leaks are DIY-friendly, there are times when it’s best to call in the pros:
- If You Can’t Find the Leak: Some leaks are very subtle or in hard-to-reach places. A professional shop has specialized tools (like smoke machines) and expertise to find them quickly.
- Complex Repairs: Replacing an intake manifold gasket can be intricate and may require specific torque specs or disassembly that you’re not comfortable with.
- Multiple or Persistent Codes: If you’re getting multiple, seemingly unrelated trouble codes, or if the CEL keeps coming back after you’ve tried a fix, there might be a more complex underlying issue.
- Lack of Tools or Confidence: Don’t force yourself into a repair you’re not confident about. Incorrectly fixing one thing can lead to new problems.
Conclusion
A vacuum leak in a car engine might seem intimidating, but by understanding what it is and how to diagnose it, you’re already halfway to a solution. From a simple loose hose to a cracked gasket, knowing the symptoms and following a systematic approach can save you a trip to the mechanic and a significant chunk of change. Always prioritize safety, be patient with your inspection, and don’t hesitate to seek professional help if the problem proves too challenging.
Keeping your engine’s vacuum system in top shape is crucial for smooth performance, good fuel economy, and a healthier car overall. So, next time your engine acts up, you’ll know exactly where to start looking!