How to Test Vacuum Pump on Car
Testing your car’s vacuum pump is essential for diagnosing engine performance and brake assist issues. This guide walks you through simple methods to check if your vacuum pump is working properly, including visual inspection, hose pressure tests, and listening for leaks. You’ll learn what signs point to failure and how to confirm whether the issue lies with the pump or another system component.
Key Takeaways
- Vacuum pumps power critical systems: They support brake boosters, automatic transmissions, HVAC controls, and some fuel delivery systems.
- Signs of a failing vacuum pump: Hard braking, erratic idle, loss of power steering, or dashboard warning lights can indicate pump trouble.
- Testing doesn’t require expensive tools: A vacuum gauge, basic hand tools, and a flashlight are often enough to perform a functional check.
- Location matters: Most vacuum pumps are near the engine, connected via hoses from the intake manifold.
- Listen for unusual noises: Grinding, whining, or squealing may mean internal wear or belt slippage.
- Check hose connections first: Loose, cracked, or disconnected hoses cause false vacuum loss and mimic pump failure.
- Professional help is wise: If testing confirms a faulty pump, replacement should be done by a qualified mechanic to avoid safety risks.
Quick Answers to Common Questions
Tip/Question?
Answer Can I test the vacuum pump without disconnecting anything? Yes—some modern vehicles allow you to read live data via OBD-II scanners showing manifold vacuum. Plug in a scanner and monitor “MAP sensor” or “barometric pressure” values at idle. Compare to specs in your manual.
Tip/Question?
Answer What if my vacuum gauge shows normal readings but brakes feel weak? The issue might be the brake booster diaphragm, not the pump. Push the brake pedal with the engine off—it should feel firm. If it sinks slowly, the booster is leaking internally even with good vacuum supply.
Tip/Question?
Answer How often should I check vacuum lines? Every oil change or tire rotation is a good opportunity. Cracks develop silently due to heat and age. Replace brittle or hardened hoses proactively—they’re cheap insurance.
Tip/Question?
Answer Can weather affect vacuum readings? Cold starts can temporarily lower readings due to condensation in the intake. Warm up the engine fully before testing. Also, high altitude reduces baseline vacuum (~5 inHg less per 5,000 ft elevation).
Tip/Question?
Answer Should I replace all vacuum hoses when fixing the pump? Absolutely. Hoses are inexpensive, but replacing them ensures long-term reliability. Old hoses dry out and crack faster after pump work, risking repeat failures.
Troubleshooting Common Problems
Even with accurate testing, interpreting results takes experience. Here’s how to match symptoms to causes:
- Low/no vacuum at idle: Likely a weak pump, clogged inlet filter, or severe internal wear.
- Vacuum fluctuates wildly: Faulty diaphragm, loose mounting, or intake manifold gasket leak.
- Brake pedal feels hard: Could be low vacuum (bad pump) OR a stuck brake booster valve.
- Engine stalls when cold: Often due to vacuum leaks in PCV or EGR lines—not the pump itself.
- Pump makes noise but no vacuum: Belt slipping or sheared gears inside the pump.
When in doubt, compare your readings to factory specifications in the service manual. Values vary by engine size and year—don’t assume “normal” is always 18 inHg.
When to Replace vs. Repair
A failing vacuum pump rarely self-repairs. However, minor issues like a cracked housing or worn diaphragm may be fixable. If the pump is sealed (non-serviceable), replacement is the only option. Cost varies widely: expect $100–$400 for parts plus labor ($50–$150/hour). In many cases, replacing the entire assembly is more efficient than partial repairs.
Visual guide about how to test vacuum pump on car
Image source: sizechartwomen.com
What Is a Vacuum Pump and Why Does It Matter?
Your car’s vacuum pump creates suction (vacuum) that powers several important systems. In vehicles with hydraulic brakes, it helps the brake booster multiply your foot strength. In cars with automatic transmissions, it signals shift points. Some older engines use vacuum for choke operation or emission controls. When the vacuum pump fails, these systems suffer—leading to unsafe braking, poor shifting, or rough idling.
Visual guide about how to test vacuum pump on car
Image source: 1.bp.blogspot.com
Most vacuum pumps are driven by the engine via a belt and located near the front of the motor. Unlike turbocharged engines that use exhaust pressure, vacuum systems rely on clean, dry air drawn from the intake manifold. Over time, contamination, heat, and vibration can wear out seals, bearings, or diaphragms inside the pump. The result? Reduced vacuum pressure or complete failure.
This guide will show you how to test your vacuum pump safely and accurately—without removing it from the vehicle. Whether you’re troubleshooting a spongy brake pedal or just want to stay ahead of potential issues, knowing how to test vacuum pump on car gives you control over your vehicle’s health.
Tools and Materials Needed
You don’t need a full garage setup to test a vacuum pump. With a few common tools and a bit of patience, you can diagnose the problem yourself. Here’s what you’ll need:
- Digital vacuum gauge: Measures psi or kPa; look for one with a quick-connect fitting.
- Handheld vacuum pump tester kit: Some kits include a portable pump to simulate engine vacuum.
- Screwdrivers: Phillips and flathead for panel or hose removal.
- Flashlight: To see tight spaces around the engine bay.
- Clean rags: For wiping hoses and connections.
- Zip ties or clamps: To secure hoses during testing.
- Owner’s manual: For model-specific vacuum routing diagrams.
If you’re unsure which tools are available, start with the vacuum gauge and flashlight. Many auto parts stores rent gauges for short-term use.
Step-by-Step: How to Test Vacuum Pump on Car
1. Locate the Vacuum Pump
Turn off the engine and pop the hood. Look near the front of the engine block, usually on the driver’s side. On most vehicles, the vacuum pump is attached to the intake manifold with metal or plastic fittings. It may have a rubber diaphragm visible through a clear cover—common in older GM vehicles. Newer models might use an electric vacuum pump (EVP), which sits separately but connects similarly.
Tip: If you’re still unsure, consult your owner’s manual or search “vacuum pump location [your make/model].” YouTube videos can also help identify the part visually.
2. Inspect Visually and Audibly
With the engine off, listen for any grinding, squealing, or rattling from the pump area. Shake the pump gently (if accessible) to detect loose internal components. Check all vacuum hoses for cracks, soft spots, or disconnections. A disconnected hose looks like a major red flag—but don’t assume the pump itself is fine until you verify.
Also inspect the drive belt: fraying, glazing, or looseness affects pump performance. Tighten or replace as needed.
3. Start the Engine and Check Idle Behavior
Bump the starter to bring the engine up to operating temperature. Observe how it runs. A healthy vacuum system supports smooth idle—no surging, stalling, or hesitation. Note any dashboard warnings (e.g., brake or check engine light). These clues help narrow down whether the issue is mechanical, electrical, or related to vacuum supply.
If the engine runs rough, dies when warmed, or has a persistent hissing sound, proceed to step 4.
4. Connect a Vacuum Gauge
Locate a vacuum source hose—usually labeled or routed from the intake manifold to the brake booster. Disconnect one end using pliers or a screwdriver. Attach your vacuum gauge firmly using its quick-connect adapter. Secure the loose hose end with a clamp or zip tie to prevent air leaks during test.
Run the engine at idle for 30–60 seconds. Read the gauge. Healthy systems typically show 15–20 inHg (inches of mercury) or 5–7 kPa at idle. Lower readings suggest leaks or pump weakness.
Example: A 2005 Honda Civic with a good vacuum pump should read ~18 inHg at idle. If it drops below 10 inHg, investigate further.
5. Perform a Static Vacuum Test (Optional)
Shut off the engine. Watch the gauge over 30–60 seconds. Vacuum should hold steady unless there’s a leak. A drop of more than 2–3 inHg indicates a fault—either in the pump, hose, or connection. Mark where the leak occurs by spraying carb cleaner or soapy water along joints while the engine is running (with caution).
This method isolates whether the problem is active (running) or passive (static).
6. Listen for Leaks
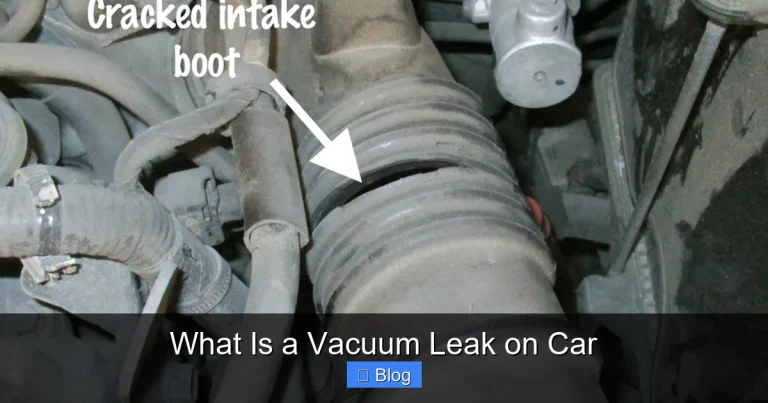
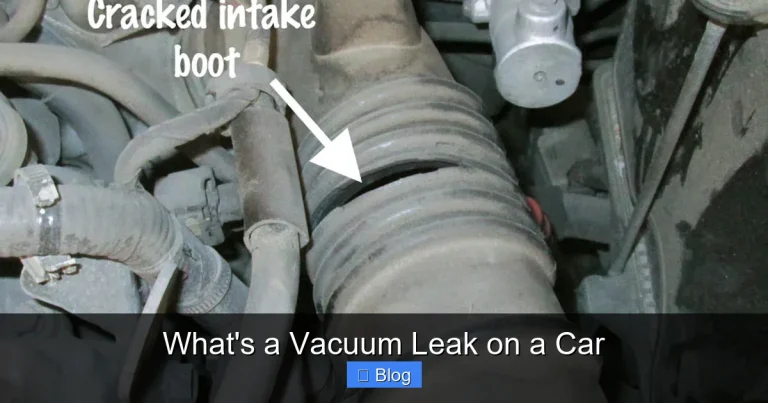
While the engine runs, spray soapy water around all vacuum ports and hoses. Bubbles form instantly at leaks. Pay attention to the brake booster, EGR valve, PCV system, and throttle body. Even small leaks reduce overall vacuum and fool you into thinking the pump is bad when the real culprit is a cracked hose.
Note: Avoid spraying directly into electronic sensors unless instructed.
7. Confirm Pump Output (If Possible)
Some diagnostic shops use specialized equipment to measure pump output under load. As a DIYer, you can simulate this by partially blocking the vacuum line (not recommended long-term) or comparing results across multiple vacuum sources. If one hose reads much lower than others, the pump may distribute unevenly.
Alternatively, swap suspect hoses between known-good ports to test functionality.
Quick Reference: Testing Methods Compared
| Method | Best For | Time Required | Accuracy |
|---|---|---|---|
| Idle vacuum reading | General diagnosis, brake/boost issues | 5–10 minutes | High |
| Static vacuum hold test | Finding leaks, seal integrity | 1–2 minutes | Medium |
| Leak detection spray | Pinpointing crack locations | 10–15 minutes | Very High |
| Belt tension check | Mechanical drivetrain issues | 2–5 minutes | Low-Medium |
| OBD-II scan (if supported) | Modern EVs or hybrid systems | 5 minutes | Varies |
Electric vacuum pumps (EVPs) found in some hybrids or turbocharged cars require battery power and wiring checks—not just mechanical testing. Always verify electrical continuity and fuse integrity if the pump doesn’t engage.
Conclusion: Stay Ahead with Simple Tests
Learning how to test vacuum pump on car empowers you to catch problems early, save money on diagnostics, and maintain safety-critical systems. You don’t need fancy tools—just a gauge, a flashlight, and a methodical approach. Remember: many vacuum-related symptoms stem from loose hoses or minor leaks, not the pump itself. By checking connections first, you avoid unnecessary replacements.
Regular inspections every 30,000 miles or during routine maintenance go a long way. And when replacement is needed, informed decisions lead to better outcomes. Your brakes, transmission, and engine depend on clean, strong vacuum—so treat this system with care.