How to Test for a Vacuum Leak in a Car
A vacuum leak can cause rough idling, poor fuel economy, or check engine lights in your vehicle. Testing for leaks is easy with basic tools like a smoke machine or carburetor cleaner. This guide walks you through proven methods to find and fix the problem quickly and effectively.
Key Takeaways
- Vacuum leaks often cause misfires and reduced engine power. They occur when unmetered air enters the intake system, disrupting the air-fuel ratio.
- Common signs include rough idle, hesitation, and high idle speed. You may also hear hissing sounds near the intake manifold.
- Visual inspection and listening are the first steps. Look for cracked hoses and listen for escaping air near gaskets and connections.
- Smoke testing is the most accurate method. It visually shows where vacuum leaks originate using harmless, visible smoke.
- Propane or carburetor cleaner can help locate smaller leaks. A sudden increase in engine RPM indicates a leak nearby.
- Replacing damaged components restores proper engine function. Always use OEM or high-quality aftermarket parts for best results.
- Regular maintenance prevents future leaks. Inspect hoses and vacuum lines during routine tune-ups.
Quick Answers to Common Questions
Can I drive my car with a vacuum leak?
Yes, but not for long. A vacuum leak causes poor performance, higher emissions, and potential misfires. Drive cautiously and get it fixed soon to avoid damaging the catalytic converter or spark plugs.
How much does it cost to fix a vacuum leak?
It varies widely. Replacing a vacuum hose costs $10–$30. A new intake manifold gasket may run $100–$300 in labor and parts. DIY repairs save money, especially on simple hoses.
Will a vacuum leak trigger a check engine light?
Not always. Some small leaks go undetected by onboard diagnostics. However, severe leaks can cause misfire codes (P0300 series) or fuel trim issues. A scan tool can help confirm.
Is it safe to use WD-40 instead of carburetor cleaner?
No. WD-40 contains lubricants that can gum up fuel systems. Use only carburetor cleaner or propane—both evaporate cleanly and won’t harm components.
How often should I inspect vacuum lines?
Check them during every major service (every 6–12 months). Look for cracks, soft spots, or disconnections. Replace any hose showing signs of aging, especially in hot or cold climates.
How to Test for a Vacuum Leak in a Car: A Complete Step-by-Step Guide
If your car is running rough, stalling at stops, or using more gas than usual, a vacuum leak might be the culprit. These leaks allow extra air to enter the engine without being measured by the mass airflow (MAF) sensor. The result? A lean air-fuel mixture, poor performance, and potential damage over time. But don’t worry—testing for a vacuum leak doesn’t require expensive tools or deep mechanical expertise. With patience and the right approach, you can identify and fix the issue yourself.
In this guide, you’ll learn how to detect vacuum leaks using five reliable methods: visual inspection, listening for hisses, smoke testing, propane enrichment, and carburetor cleaner spray. Each method has its strengths, and we’ll walk you through when and how to use them. By the end, you’ll know exactly what to look for and how to restore your car’s smooth operation.
What Is a Vacuum Leak?
A vacuum leak happens when air finds an unintended path into the intake manifold. Unlike the controlled air the engine needs for combustion, this extra air isn’t measured by the ECU, so the fuel injection system delivers too little fuel. This creates a lean condition that can cause misfires, hesitation, and even carbon buildup in the cylinders.

Visual guide about how to test for a vacuum leak in a car
Image source: img.refined-travel.com
Vaccum leaks commonly occur in older vehicles or those with worn gaskets, cracked plastic intake manifolds, or degraded rubber hoses. Common locations include the PCV valve, brake booster line, throttle body gasket, and vacuum advance on the distributor. Even small leaks can cause big problems, especially at idle when airflow is minimal.
Tools and Materials Needed
You don’t need a professional diagnostic setup to find a vacuum leak. Most of these tools are inexpensive or already in your garage. Here’s what you’ll need:
Visual guide about how to test for a vacuum leak in a car
Image source: i.pinimg.com
Having the right tools makes the process safer and more effective. While you can start with just a flashlight and carburetor cleaner, investing in a smoke machine pays off in accuracy and peace of mind.
Step 1: Perform a Visual Inspection
The easiest place to start is by looking under the hood. Vacuum leaks often leave obvious signs. Begin by turning off the engine and letting it cool slightly. Then, pop the hood and inspect all vacuum hoses and connections.
Look for Cracks, Disconnections, or Dry Rot
Rubber vacuum lines are prone to cracking over time, especially near sharp edges or heat sources. Check every hose from the intake manifold to the brake booster, PCV valve, and fuel pressure regulator. If a hose is split or brittle, it’s likely leaking.
Check Gaskets and Seals
The intake manifold gasket and throttle body gasket are common failure points. Look for oil residue or soot around these areas—it can indicate a slow leak or past repair. Also inspect the PCV valve housing and vacuum advance diaphragm on older engines.
Tip: Use a flashlight to peer behind hoses and into tight spaces. Sometimes leaks aren’t visible from the front.
Step 2: Listen for Hissing Sounds
Running the engine for a few minutes helps warm things up and makes vacuum leaks easier to hear. After starting the car, let it idle smoothly. Now, turn off the ignition and listen carefully.
With the engine off, gently press your ear near the intake manifold, throttle body, and vacuum hoses. You may hear a faint hissing sound as residual vacuum escapes. If you don’t have good hearing, use a mechanic’s stethoscope or wrap a piece of tubing around your ear to amplify the sound.
Troubleshooting Tip
If you can’t hear anything, try spraying a bit of carburetor cleaner around suspected areas while the engine is running. If the RPM increases suddenly, you’ve found a leak. This method works because the extra fuel from the spray temporarily compensates for the missing air.
Step 3: Use Carburetor Cleaner to Find Small Leaks
This method is great for detecting tiny leaks that aren’t visible or audible. Start the engine and let it reach normal operating temperature. Then, locate a small nozzle on your carburetor cleaner can.
| Tool/Material | Purpose | Notes |
|---|---|---|
| Flashlight | Illuminates hard-to-see areas under the hood | Use a bright LED for better visibility |
| Torque wrench (optional) | Ensures vacuum lines are tightened properly | Not always needed, but helpful for reassembly |
| Carburetor cleaner | Spray tool to detect small leaks via RPM change | Available at auto parts stores |
| Propane torch or propane bottle (with hose) | Increases RPM when sprayed near leak | Only use outdoors or in well-ventilated areas |
| Smoke machine or smoke pen | Most accurate way to see leaks | Rentable or affordable DIY kits available |
| New vacuum hoses (if needed) | Replacement parts after locating leak | Check compatibility with your vehicle |
Spray Around Suspected Areas
Gently spray the cleaner around the intake manifold, throttle body, PCV valve, and any disconnected hoses. Watch the tachometer closely. If the engine RPM jumps noticeably, the cleaner’s solvent effect temporarily fixes the lean condition, revealing the leak location.
Caution: Do not spray directly into the intake or throttle body. Only apply near external connections. Also, avoid prolonged exposure to the fumes—work in a ventilated area.
Step 4: Try Propane Enrichment
Propane acts similarly to carburetor cleaner but with a stronger effect. Attach a propane torch or a propane bottle with a hose and nozzle to your vehicle. Never use an open flame near fuel or oxygen sensors.
Spray Near Intake Components
With the engine running, slowly spray propane near the intake manifold, vacuum lines, and throttle body. If the RPM increases rapidly, you’ve located the leak. Release the trigger immediately once the change occurs to avoid over-enriching the mixture.
This method is especially useful for intermittent leaks that only appear when the engine is warm.
Step 5: Perform a Smoke Test
For the most accurate diagnosis, a smoke test is unbeatable. It introduces non-toxic, visible smoke into the intake system, making even microscopic leaks easy to spot.
How It Works
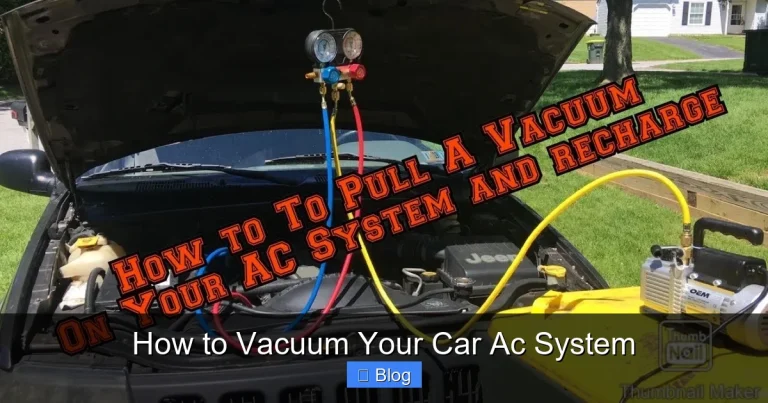
Connect the smoke machine to a vacuum source (like the brake booster or intake manifold). Turn on the machine, and it will push smoke through the system. As the smoke escapes through a leak, you’ll see it billowing out from the exact location.
DIY Smoke Test Option
Some DIYers use a smoke pen—a handheld device that generates fine mist. While less thorough than a full machine, it’s portable and effective for smaller leaks. Just follow the manufacturer’s instructions and ensure the engine is off before connecting the tool.
Pro Tip: Have someone inside the cabin with you when doing a smoke test. They can help confirm if smoke appears in unusual places, like the cabin air intake.
How to Fix a Vacuum Leak
Once you’ve identified the leak, fixing it depends on the severity. For cracked hoses, simply replace them with new ones. Use OEM-spec hoses or high-quality aftermarket alternatives for durability.
If the intake manifold gasket is leaking, replacement is more involved. This usually requires removing the intake manifold, cleaning surfaces, and installing a new gasket. Consider consulting a repair manual or watching a tutorial specific to your vehicle.
After repairs, recheck for leaks using one of the detection methods above. Proper sealing ensures long-term reliability and optimal engine performance.
When to Replace vs. Repair
Not all leaks require full part replacement. Minor cracks in vacuum lines can sometimes be sealed with high-temperature epoxy or replaced with silicone hose clamps. However, compromised gaskets or internal manifold cracks often demand full replacement for lasting results.
When in doubt, consult a trusted mechanic. Some leaks, like those in the PCV system or EGR valve, may involve complex diagnostics beyond basic testing.
Preventing Future Vacuum Leaks
Regular maintenance goes a long way in preventing vacuum leaks. During every oil change or tune-up, inspect vacuum lines for brittleness, cracks, or loose connections. Replace old hoses every 3–5 years, especially in hot climates.
Also, avoid using cheap generic hoses. Opt for reinforced vacuum lines designed for automotive use. They resist heat, oil, and abrasion better than standard rubber.
Finally, keep the intake area clean. Oil leaks or coolant seepage near the manifold can accelerate gasket wear.
Conclusion
Testing for a vacuum leak doesn’t have to be intimidating. With a systematic approach—starting with visual checks and progressing to smoke or propane tests—you can pinpoint even the smallest leaks. Whether you’re dealing with a rough idle or poor fuel economy, identifying and fixing a vacuum leak restores your car’s performance and efficiency.
Remember, early detection saves money and prevents further engine damage. Armed with this guide, you’re ready to tackle the job like a pro. And if you ever feel stuck, don’t hesitate to seek professional help. A healthy engine starts with a tight, leak-free vacuum system.