How to Use a Vacuum Pump on a Car Ac
Discover how to use a vacuum pump on a car AC to remove air and moisture, ensuring your vehicle’s cooling system works efficiently. This guide walks you through preparation, step-by-step instructions, and tips to avoid common mistakes. Follow along to recharge your AC with confidence and save on repair costs.
Key Takeaways
- Safety First: Always wear protective gear and work in a well-ventilated area to prevent exposure to refrigerants.
- Proper Tools: Use a reliable vacuum pump, manifold gauge set, and hoses rated for your car’s AC refrigerant type.
- Evacuation Time: Run the pump for at least 30 minutes to thoroughly remove moisture and air from the system.
- Leak Checks: Monitor vacuum levels to detect leaks; hold vacuum for 15-30 minutes without dropping below 25 inHg.
- Recharge Wisely: Only add refrigerant after confirming a strong vacuum to avoid system damage.
- Maintenance Tip: Regularly service your AC to prevent the need for frequent vacuuming.
Quick Answers to Common Questions
Tip: How long should I vacuum?
For most cars, 30-45 minutes is sufficient, but extend to an hour in humid conditions to fully remove moisture.
Question: Can I reuse AC oil after vacuuming?
Yes, if the system was clean, but always filter it. Fresh PAG or ester oil is best for new installs to avoid contamination.
Tip: What’s the best vacuum level?
Aim for 25-30 inHg. Anything less means air or leaks are still present, so don’t recharge yet.
Question: Do I need to vacuum if just topping off refrigerant?
No, but if the system was opened or low on coolant, yes—skipping it risks compressor damage from moisture.
Tip: Store your vacuum pump properly?
Drain excess oil, cap ports, and store upright in a dry spot to prevent seal degradation.
Introduction
Hey there, car enthusiasts! If you’ve ever noticed your car’s AC blowing warm air instead of that refreshing cool breeze, it might be time to tackle the system yourself. Learning how to use a vacuum pump on a car AC is a game-changer. This guide will teach you everything from the basics to the final steps, helping you evacuate air and moisture so your AC can recharge properly and perform like new.
Why bother with a vacuum pump? In a car AC system, air and moisture can sneak in during repairs or over time, leading to corrosion, reduced efficiency, and even compressor failure. By pulling a deep vacuum, you remove these contaminants, creating a clean slate for refrigerant. Whether you’re a DIY newbie or a seasoned mechanic, this step-by-step process will save you time and money. We’ll cover safety, tools, detailed instructions, tips, and troubleshooting. Let’s get your AC chilling again!
Understanding the Basics of a Vacuum Pump for Car AC
Before diving into the hands-on part, let’s break down what a vacuum pump does in your car’s AC setup. A vacuum pump is like a super-powered shop vac for your AC lines. It creates negative pressure to suck out air, water vapor, and any debris from the system. This is crucial because refrigerants like R-134a or R-1234yf don’t mix well with moisture—it can form acids that damage components.
In simple terms, think of your AC system as a sealed loop. When you open it for repairs, like replacing a hose, unwanted stuff gets in. The vacuum pump restores purity. Most pumps pull down to 15-25 inches of mercury (inHg), which is deep enough for automotive use. Expect the process to take 30-60 minutes, depending on your car’s system size. Pro tip: Always match your pump to the refrigerant type to avoid contamination.
Safety Precautions Before Starting
Safety isn’t just a buzzword—it’s essential when dealing with car AC systems. Refrigerants can be harmful if inhaled or if they contact skin, and vacuum pumps generate heat. Start by parking your car in a flat, well-ventilated garage. Turn off the engine and let it cool completely.

Visual guide about How to Use a Vacuum Pump on a Car Ac
Image source: clipart-library.com
Wear Protective Gear
Grab safety goggles, gloves, and a face mask. These protect against refrigerant leaks or flying debris. If you’re working with older systems using R-12, extra caution is needed due to its ozone-depleting nature—though most modern cars use safer alternatives.
Disconnect the Battery
Pop the hood and disconnect the negative battery terminal. This prevents accidental activation of the AC compressor or electrical shorts. Double-check that fuses related to the AC are removed if possible.
One example: I once skipped disconnecting the battery on a quick job, and a spark nearly gave me a heart attack. Lesson learned—always prioritize safety to keep things fun and injury-free.
Tools and Materials You’ll Need
Gathering the right gear makes how to use a vacuum pump on a car AC smooth and frustration-free. You don’t need a full shop, but quality matters. Invest in tools that can handle the pressure—literally.
| Tool | Purpose | Recommended Specs |
|---|---|---|
| Vacuum Pump | Pulls air and moisture from AC lines | 2-5 CFM, oil-sealed rotary vane |
| Manifold Gauge Set | Monitors low/high pressure sides | With color-coded hoses (blue/red/yellow) |
| AC Hoses | Connects pump to service ports | Refrigerant-rated, 3/8″ flare fittings |
| Micrometer Torque Wrench | Tightens connections securely | 0-50 ft-lbs range |
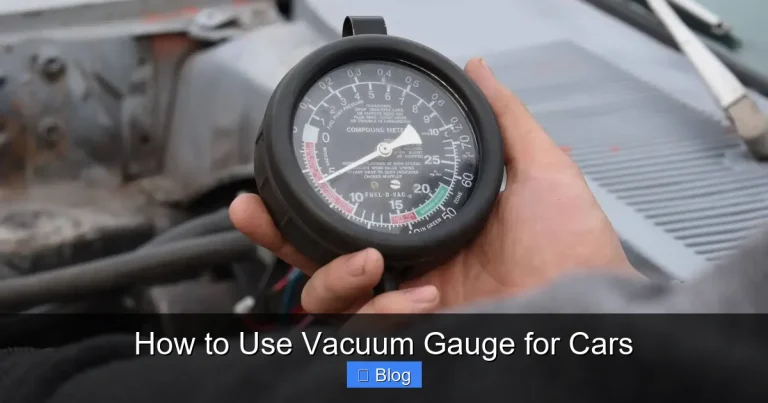
| Vacuum Gauge | Measures vacuum depth | 0-30 inHg analog or digital |
| Thread Sealant Tape | Prevents leaks at fittings | PTFE, 1/2″ width |
| Safety Gear | Protects user from hazards | Goggles, gloves, mask |
Basic list includes a vacuum pump (2-5 CFM rating is ideal for cars), a manifold gauge set, AC hoses, and refrigerant (once you’re done vacuuming). Don’t forget thread sealant tape for connections and a thermometer for post-vacuum checks.
With these in hand, you’re set. For example, on a Honda Civic, the service ports are under the hood near the receiver-drier—easy access with the right hoses.
Preparing Your Car’s AC System
Prep work sets the stage for success. Locate your car’s AC service ports: the low-pressure port (larger, often blue cap) on the suction line, and the high-pressure (smaller, red cap) on the discharge line. Consult your owner’s manual for exact spots—locations vary by make and model.
Recover Existing Refrigerant
If there’s any refrigerant left, you must recover it legally and safely. Use a recovery machine or take it to a shop. Venting is illegal and harmful to the environment. Once empty, cap the ports to keep dirt out.
Inspect for Leaks or Damage
Walk around the system. Check hoses for cracks, the compressor for oil stains (a leak sign), and fittings for looseness. Tighten what you can, but if you spot major issues, stop and consult a pro. A quick visual saved me from vacuuming a leaky system once—wasted effort otherwise.
Practical tip: Clean ports with compressed air before connecting. Dust is the enemy of a good vacuum.
Step-by-Step Guide: How to Use a Vacuum Pump on a Car AC
Now, the main event! This is where you learn precisely how to use a vacuum pump on a car AC. Follow these steps carefully. We’ll assume you’ve prepped and have your tools ready. Work methodically to avoid rushing errors.
Step 1: Connect the Manifold Gauge Set
Attach the blue hose to the low-pressure port and the red to the high-pressure port. The yellow hose goes to your vacuum pump’s inlet. Use the torque wrench to snug fittings—about 10-15 ft-lbs, no more, to avoid stripping.
Open both manifold valves slowly. Example: On a Ford F-150, the ports are near the firewall; routing hoses keeps them from kinking.
Step 2: Hook Up the Vacuum Pump
Place the pump on a stable surface near the car. Connect the yellow hose securely. Prime the pump if it’s oil-based—fill to the sight glass level. Turn on the pump briefly to check for oil leaks.
Tip: Elevate the pump slightly above the car to aid oil return. This prevents damage over time.
Step 3: Start the Vacuum Process
With everything connected, open the manifold valves fully. Fire up the vacuum pump. You’ll hear it hum as it pulls down the system. Watch the gauges: Aim for 25-29 inHg within 5-10 minutes.
Let it run for at least 30 minutes. For larger systems like trucks, go 45-60 minutes. Moisture boils off at low pressure, so patience pays off. Monitor the pump’s temp—it shouldn’t overheat.
Step 4: Monitor and Hold the Vacuum
Once at full vacuum, close the manifold valves and shut off the pump. Watch the gauge for 15-30 minutes. If it holds steady, great—no leaks! If it rises above 10 inHg, there’s a problem (more on that in troubleshooting).
Example: In humid climates, extra time helps evaporate stubborn water. I once held vacuum on a Subaru for 45 minutes and nailed a tiny leak that way.
Step 5: Break the Vacuum and Disconnect
Slowly open the manifold to release vacuum—do it gradually to avoid oil splash-back. Disconnect hoses starting from the pump. Cap all ports immediately.
Now your system is prepped for refrigerant recharge. Add it via the low port, following your car’s specs (usually 18-24 oz for sedans).
Throughout, stay hydrated and take breaks. This process can be tedious, but the cool air reward is worth it!
Troubleshooting Common Issues
Even with careful steps, things can go sideways when learning how to use a vacuum pump on a car AC. Here’s how to handle hiccups.
Pump Won’t Pull Deep Vacuum
If you stall at 15 inHg, check hoses for blockages or leaks. Oil might be low—top it up. Dirty filters inside the pump? Clean or replace them. Example: A loose connection dropped my vacuum by 10 inHg; tightening fixed it instantly.
System Loses Vacuum Quickly
This screams leaks. Use soapy water on fittings—bubbles indicate the spot. Common culprits: Schrader valves or O-rings. Replace worn parts and retry.
Overheating Pump
Let it cool and check oil levels. Ensure good airflow around the unit. If persistent, it might need servicing. Tip: Run in short bursts if it’s a budget pump.
Post-Vacuum AC Still Weak
You might have missed moisture. Re-vacuum longer or check the expansion valve. Always verify refrigerant amount with gauges—over or under charging kills efficiency.
Remember, if issues persist, a professional diagnostic tool like an AC scanner can pinpoint electrical gremlins.
Conclusion
Congrats—you’ve mastered how to use a vacuum pump on a car AC! By following this guide, you’ve not only revived your cooling system but also gained skills for future maintenance. Regular vacuuming prevents bigger problems, keeping your drives comfortable year-round.
Drive safe, stay cool, and tackle that AC with confidence. If you run into unique car quirks, forums like Reddit’s r/MechanicAdvice are goldmines. Happy wrenching!