How to Use Car Vacuum at Gas Station
Keeping your car clean doesn’t have to be a hassle, especially when you’re already at the gas station. This guide walks you through how to use a car vacuum at the gas station efficiently, from preparation to finishing touches. You’ll save time and effort while maintaining a tidy ride.
How to Use Car Vacuum at Gas Station
Ever pulled up to a gas station and noticed your car’s interior looking a bit worse for wear? Dust, crumbs, and pet hair can pile up fast, especially if you’re on the road a lot. That’s where learning how to use a car vacuum at the gas station comes in handy. This guide will teach you everything you need to know to give your vehicle a quick, effective clean right there at the pump. We’ll cover preparation, step-by-step instructions, tips to avoid common mistakes, and even troubleshooting. By the end, you’ll be confident in keeping your car spotless without needing fancy equipment or a trip to the car wash. Let’s dive in and make your next stop more productive.
Step 4: Detail the Dashboard and Hard Surfaces
Grab the brush attachment for the dashboard, console, and vents. Gently vacuum dust from buttons, screens, and air registers. Be careful around sensitive areas like the stereo.
For cup holders, use the crevice tool to suck out residue. If it’s sunny, the vacuum will pick up pollen easily. This prevents allergens from building up and keeps your air fresh.
Step 5: Tackle the Trunk or Cargo Area
If your trunk needs attention, open it wide. Vacuum the carpet, pockets, and under the spare tire well. Remove groceries or tools first to access hidden dirt.
Example: After hauling sports gear, you’ll find leaves and mud here. A quick pass keeps it organized and odor-free.
Step 6: Final Inspection and Wrap-Up
Turn off the vacuum and do a walk-around. Check for missed spots under seats or in corners. Empty the vacuum’s canister into a trash bin—most stations have one nearby.
Wipe down any smudges with a cloth. Close everything up and admire your clean car. Total time: 10-15 minutes for a standard clean.
Key Takeaways
- Prepare ahead: Park in the right spot and gather tools to make vacuuming smooth and quick.
- Follow steps carefully: Start from the top and work down for the best results without missing spots.
- Use attachments wisely: Different nozzles help tackle crevices, seats, and floors effectively.
- Mind the time: Gas station vacuums often run on coins, so plan your session to avoid interruptions.
- Clean up properly: Empty debris and check for forgotten items to keep the area tidy.
- Troubleshoot issues: Know how to handle clogs or weak suction for a frustration-free clean.
- Make it routine: Regular use prevents deep dirt buildup and keeps your car fresh.
Quick Answers to Common Questions
Tip: How many quarters do I need?
Plan for 4-8 quarters for a 10-15 minute session. Check the machine’s rate—usually $1-2 for a few minutes.
Question: Can I vacuum wet messes?
No, stick to dry debris. Wet vacuums are rare at stations; let spills dry first to avoid damage.
Tip: Best time to vacuum?
Do it during off-peak hours like mornings to avoid lines and have more space.
Question: What if the vacuum is broken?
Ask the gas station attendant for another unit or a refund. Many have multiples available.
Tip: Protect electronics?
Cover screens with a cloth and avoid direct hose contact to prevent static or scratches.
Practical Tips and Examples for Best Results
To make how to use a car vacuum at the gas station even easier, try these hacks. First, vacuum weekly if you drive daily—it prevents deep grime. For families, focus on kid zones like rear seats after school runs.
Choose the right time: Early mornings or evenings mean fewer crowds and better lighting. If the hose is short, reposition your car closer. Wear gloves if it’s dusty outside.
- Save coins: Estimate 4-6 quarters for a full session; practice at home with a shop vac to time it.
- Pet hair trick: Go over spots twice with the brush for stubborn fur.
- Odor control: Sprinkle baking soda before vacuuming to neutralize smells—let it sit 5 minutes.
Real-life example: Sarah, a commuter, vacuums every fill-up. She removed months of coffee stains this way, saving on professional cleans. You can too!
Troubleshooting Common Issues
Sometimes things don’t go perfectly. Here’s how to fix it.
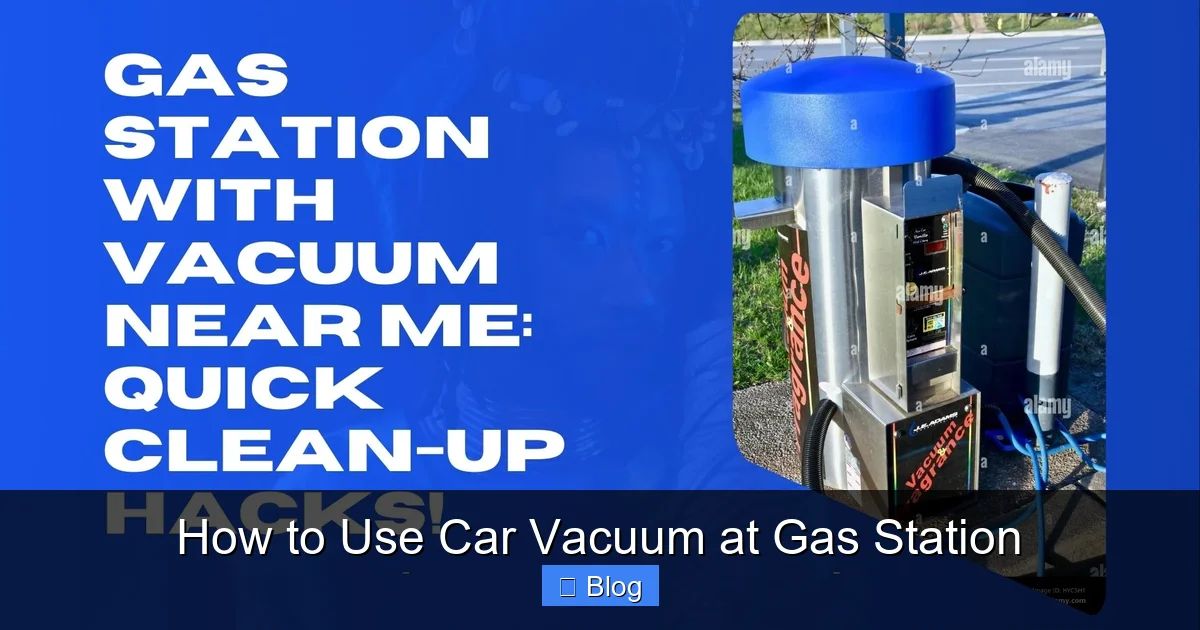
Visual guide about How to Use Car Vacuum at Gas Station
Image source: vacuumpost.com
Why Use a Car Vacuum at the Gas Station?
Gas stations are convenient hubs for drivers. While you’re filling up the tank, why not tackle the interior mess? Many stations offer coin-operated vacuums that are powerful and easy to access. This approach saves time and money compared to professional detailing. Plus, it’s eco-friendly since you’re not driving extra miles just to clean.
Visual guide about How to Use Car Vacuum at Gas Station
Image source: i.ytimg.com
Think about it: a quick vacuum session can remove sand from beach trips, snack wrappers from family outings, or mud from rainy days. Regular use prevents odors and wear on fabrics. If you’re wondering how to use a car vacuum at the gas station for the first time, don’t worry—it’s simpler than it seems. These machines are designed for on-the-go use, and with the right technique, you’ll see results in under 15 minutes.
Prepare Your Car and Gather Supplies
Before you start vacuuming, a little prep goes a long way. Park your car in a spot near the vacuum station—look for signs or dedicated areas. This keeps things safe and out of the way of other drivers.
Check the Vacuum Availability
Scan the gas station lot for the vacuum unit. Most are self-service and require quarters or tokens. Have change ready, or use a card if available. Test the hose to ensure it’s not damaged.
Gather Your Tools
You don’t need much beyond the station’s vacuum, but extras help. Bring a trash bag for large debris, microfiber cloths for wiping, and perhaps a brush for stubborn spots. If you have kids’ toys or mats, remove them first to vacuum underneath.
For example, if you’ve just come from a hike, shake out floor mats outside before vacuuming. This makes the process faster and uses fewer coins.
Step-by-Step Guide to Vacuuming Your Car
Now for the main event: the actual cleaning. Follow these steps in order to cover every inch efficiently. Start with the vacuum powered on and the hose in hand. Aim to work systematically so you don’t miss areas or redo work.
Step 1: Clear Out Loose Debris
Begin by removing trash manually. Open all doors and the trunk. Pick up cups, papers, and wrappers by hand. This prevents the vacuum from clogging early on.
Pro tip: Use a portable trash bag clipped to the door handle. For seats, lift cushions if possible to shake out crumbs. Spend about 2-3 minutes here—it’s worth it for smoother vacuuming later.
Step 2: Vacuum the Seats and Upholstery
Attach the upholstery nozzle or brush tool. Start from the top of the seats and work downward. Go over headrests, backrests, and cushions in slow, overlapping strokes.
Focus on creases where dirt hides. For leather seats, use a soft brush attachment to avoid scratches. If you have pets, pay extra attention to hair-prone spots like the back seat. This step usually takes 4-5 minutes per row.
Step 3: Clean the Floors and Carpets
Switch to the crevice tool for tight spaces. Vacuum under seats, along door sills, and in footwells. Pull the hose with steady pressure to lift embedded dirt.
If mats are removable, take them out and vacuum both sides. Shake them vigorously outside first. Example: After a road trip, you’ll find sand and gravel here—get it all to prevent tracking it home.
At this point in your session, you’re about halfway through. A quick reference can help you stay on track without wasting time or coins.
Quick Reference: Vacuuming Steps at a Glance
| Step | Action | Time Estimate | Tip |
|---|---|---|---|
| 1. Clear Debris | Remove trash by hand | 2-3 minutes | Use a bag to collect items quickly |
| 2. Vacuum Seats | Use upholstery tool on seats | 4-5 minutes | Work top to bottom to catch falling dirt |
| 3. Clean Floors | Crevice tool for carpets and mats | 3-4 minutes | Remove mats for thorough cleaning |
| 4. Detail Interiors | Brush for dashboard and vents | 2-3 minutes | Avoid liquids near electronics |
| 5. Final Check | Inspect and empty vacuum | 1-2 minutes | Dispose of debris responsibly |
| 6. Trunk and Extras | Vacuum cargo area if needed | 2 minutes | Secure loose items first |
Weak Suction or Clogs
If suction drops, check the hose for blockages. Use a stick or wire to clear debris from the end. Empty the canister if it’s full—overloading weakens power.
Tip: Prevent this by clearing large items first. If the machine is faulty, ask station staff or move to another unit.
Hose Won’t Extend or Damaged
Pull gently; some tangle inside. If broken, don’t force it—report to attendants. Most stations have backups.
Spilling Coins or No Change
Keep quarters in your glove box. Some apps or machines take bills now. If stuck, politely ask for help.
Another issue: Wet spots from spills. Vacuum dry first, then blot—avoid soaking the machine.
By addressing these, your experience stays smooth. Remember, practice makes perfect.
Conclusion
Mastering how to use a car vacuum at the gas station turns a routine stop into a cleaning win. You’ve got the steps, tips, and fixes to keep your car fresh without effort. Next time you’re pumping gas, give it a try—you’ll feel the difference immediately. Drive clean, stay organized, and enjoy the ride. If you have questions, drop a comment below!