How to Use a Vacuum Pump on Car Ac
Using a vacuum pump on your car AC is a key step to remove air and moisture before recharging the system, ensuring it runs efficiently and prevents damage. This guide walks you through the process safely and effectively, from gathering tools to troubleshooting common issues. Follow these steps to maintain your vehicle’s cooling system like a pro.
Key Takeaways
- Safety First: Always wear protective gear and work in a well-ventilated area to avoid refrigerant exposure.
- Prepare Properly: Locate and access the AC service ports on your car before connecting any equipment.
- Run the Pump Effectively: Achieve a deep vacuum of at least 29 inches Hg for 30-60 minutes to remove moisture thoroughly.
- Monitor Closely: Watch for leaks during the process to prevent system contamination.
- Recharge Smartly: Only add refrigerant after vacuuming to ensure optimal performance and avoid compressor failure.
- Troubleshoot Issues: If the vacuum doesn’t hold, check for leaks or faulty valves immediately.
Quick Answers to Common Questions
How long should I run the vacuum pump?
Run it for 30-60 minutes to reach 29 inches Hg, depending on humidity. Test by closing valves and waiting 15 minutes—if it holds, you’re good.
Can I use a vacuum pump on any car AC?
Yes, for most R-134a or R-1234yf systems, but check your manual. Older R-12 cars need special handling due to regulations.
What if I smell refrigerant during the process?
Stop immediately, ventilate the area, and check connections for leaks. Wear a mask if sensitive, and never inhale directly.
Do I need to change the pump oil often?
Yes, after every few uses or if it looks contaminated. Clean oil ensures deep vacuum without moisture carryover.
Is DIY vacuuming safe for beginners?
Absolutely, with proper gear and steps. Start simple, and if your AC has electronics, consult the manual to avoid codes.
Introduction
Hey there, fellow car enthusiast! If you’ve ever noticed your car’s air conditioning blowing warm air instead of that refreshing cool breeze, it might be time to tackle the AC system. One essential tool in this process is a vacuum pump, which helps evacuate air and moisture from the lines before recharging with refrigerant. In this guide on how to use a vacuum pump on car AC, you’ll learn everything from preparation to execution, plus tips to avoid common pitfalls. By the end, you’ll feel confident handling this DIY task, saving money on shop visits and keeping your ride comfortable all summer long. Whether you’re a beginner or refreshing your skills, we’ll break it down into simple steps with practical advice.
Gathering the Right Tools and Materials
Before diving into how to use a vacuum pump on car AC, you need the proper gear. Skipping this can lead to frustration or even damage your system. Start by checking your garage or heading to an auto parts store for these basics.

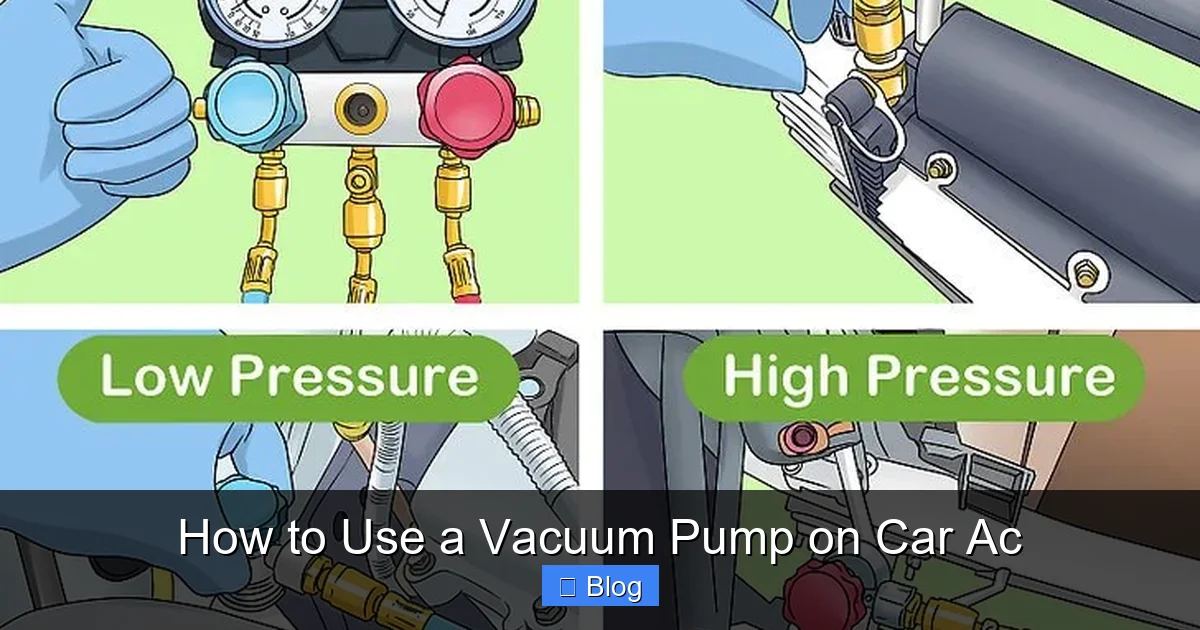
Visual guide about How to Use a Vacuum Pump on Car Ac
Image source: pic4.zhimg.com
Essential Tools List
- Vacuum Pump: Opt for a two-stage pump rated at 3-5 CFM for efficient pulling.
- Manifold Gauge Set: This connects everything and lets you monitor pressure levels.
- Hoses and Adapters: High-vacuum rated hoses that fit your car’s AC ports—usually low and high-side.
- Refrigerant: R-134a is common for most modern cars; check your owner’s manual.
- Safety Gear: Gloves, safety glasses, and a face shield to protect against oils and refrigerants.
A quick example: If you’re working on a 2010 Honda Civic, ensure your adapters match the quick-connect ports under the hood. Budget around $100-200 for a starter kit if you don’t have one. Remember, quality matters—cheap pumps might not reach the deep vacuum needed, leading to moisture traps in your AC lines.
Preparing Your Vehicle and Workspace
Safety and setup are crucial when learning how to use a vacuum pump on car AC. Park your car in a flat, shaded spot with the engine off and cooled down. Disconnect the battery to prevent any electrical mishaps, and open the hood for easy access.
Visual guide about How to Use a Vacuum Pump on Car Ac
Image source: z2.momon-ga.com
Finding the AC Service Ports
Locate the low-pressure port (usually larger, near the accumulator) and high-pressure port (smaller, near the condenser). These are capped and color-coded—blue for low, red for high. Remove the caps carefully; if they’re stuck, use pliers but avoid damaging threads.
Pro tip: Clean around the ports with a rag to prevent dirt from entering the system. If your car has an electric fan, ensure it’s off. Working in a garage with good ventilation reduces fume risks—refrigerants can be harmful if inhaled.
Initial System Check
Before connecting, inspect for visible leaks or damage. Start the engine briefly, turn AC to max, and listen for unusual noises. If the compressor doesn’t engage, you might have low refrigerant— that’s why we’re vacuuming first.
For instance, on a Ford F-150, the ports are often behind the grille. Take your time here; rushing can introduce contaminants that reduce cooling efficiency by up to 20%.
Connecting the Vacuum Pump to Your Car’s AC System
Now we’re getting to the heart of how to use a vacuum pump on car AC. Connections must be secure to create a proper seal. Double-check everything to avoid air leaks.
Attaching the Manifold Gauges
Connect the blue hose to the low-side port and the red to the high-side. The yellow hose goes to your vacuum pump’s inlet. Open all valves on the manifold slowly—never force them.
Practical advice: Use thread sealant on fittings if needed, but most modern kits are O-ring sealed. If you’re new, practice on a spare fitting to get the feel.
Securing the Pump
Place the vacuum pump on a stable surface near the engine bay. Plug it in if electric, or prepare fuel if it’s a gas model (though electric is safer indoors). Ensure the oil level in the pump is full—low oil means poor performance.
Example: For a Toyota Camry, route hoses away from hot parts like the exhaust to prevent melting. This step usually takes 5-10 minutes once you’re familiar.
Running the Vacuum Pump: Step-by-Step Operation
With connections made, it’s time to pull that vacuum. This removes air, moisture, and contaminants, prepping your AC for refrigerant. Aim for a steady process to achieve optimal results.
| Tool/Material | Purpose | Notes |
|---|---|---|
| Vacuum Pump (2-5 CFM) | Pulls air and moisture from AC lines | Electric models preferred; check oil level before use |
| Manifold Gauge Set | Monitors vacuum and pressure levels | Includes blue, red, yellow hoses; calibrate if old |
| AC Hoses and Adapters | Connects pump to service ports | High-vacuum rated; match car model (e.g., R-134a ports) |
| Refrigerant (R-134a) | Recharges system after vacuum | Use only after vacuum holds; follow EPA guidelines |
| Safety Glasses and Gloves | Protects against leaks and spills | Nitrile gloves for chemical resistance |
| Wrench Set | Tightens fittings and caps | 3/8-inch for most ports; avoid over-tightening |
| Vacuum Gauge | Measures deep vacuum depth | Aim for 29-30 inches Hg; digital for accuracy |
Start by closing the manifold valves, then turn on the pump. Watch the gauges—the low side should drop toward -30 inches Hg. Run it for at least 30 minutes; longer for humid climates.
Monitoring the Vacuum Process
- Check gauges every 5 minutes for steady decline.
- If pressure rises, stop and inspect for leaks.
- Once at vacuum, close valves and shut off the pump; let it sit 15 minutes to test hold.
Tip: In hot weather, moisture evaporates slower, so extend to 45-60 minutes. A real-world example: On my old Chevy, a 45-minute pull fixed weak cooling that persisted after recharge.
Tools and Materials Reference
To make how to use a vacuum pump on car AC smoother, here’s a quick reference table for the key items you’ll need. This at-a-glance guide helps ensure you have everything organized.
Recharging the AC System After Vacuuming
Once the vacuum holds, you’re ready to add refrigerant. This step completes the process in how to use a vacuum pump on car AC and restores cooling power.
Adding Refrigerant Safely
With the engine running and AC on max, slowly open the low-side valve on the manifold. Connect the refrigerant can to the yellow hose and shake it well. Add in short bursts, checking gauges—stop at factory specs (usually 1.5-2.5 lbs for sedans).
Example: For a Subaru Outback, add until the sight glass clears or pressure hits 25-45 psi on low side. Overcharging can damage the compressor, so err on the light side.
Testing the System
Disconnect everything, cap ports, and take a test drive. Vents should blow cold (below 50°F) within minutes. If not, you might need a professional for deeper issues.
Tip: Ambient temperature affects readings—hot days need higher pressures. Document your psi for future reference.
Troubleshooting Common Issues
Even with careful steps in how to use a vacuum pump on car AC, things can go wrong. Here’s how to handle hiccups without panic.
Vacuum Won’t Hold
If pressure creeps up after shutting off, you have a leak. Use soapy water on connections to spot bubbles. Tighten or replace O-rings—common on older cars like a 2005 Jeep.
Pump Runs But No Vacuum
Check oil level or if the pump is clogged. Two-stage pumps are better for deep pulls; single-stage might struggle below 20 inches Hg.
Weak Cooling Post-Recharge
Moisture might remain—repeat vacuum for longer. Or, the expansion valve could be faulty; that’s a shop job.
Practical example: I once forgot to close a valve, losing vacuum in 10 minutes. Always verify after each step. If issues persist, consult a mechanic to avoid voiding warranties.
Maintenance Tips for Long-Term AC Health
To extend the life of your system after learning how to use a vacuum pump on car AC, stay proactive. Run the AC weekly, even in winter, to keep seals lubricated. Check cabin filter yearly and watch for low coolant signs like fogged windows.
Bonus: Use UV dye in refrigerant to detect slow leaks under blacklight. This prevents repeat vacuum jobs.
Conclusion
Wrapping up, mastering how to use a vacuum pump on car AC empowers you to keep your vehicle cool and efficient without breaking the bank. From prepping tools to troubleshooting, these steps ensure a smooth process every time. Remember, patience pays off— a proper vacuum can boost AC performance by 30% or more. If you’re unsure, team up with a buddy or pro. Drive safe and stay cool out there!